Sushi has been eaten in Japan for centuries and it is fairly easy to make your own at home. Japanese cook and demonstrator Kimiko Barber shows you how.
Sushi is a little like Marmite; you either love it or hate it and there tends not to be any middle ground.
But for people who love it, making it at home is a lot of fun and incredibly satisfying.
A Japanese dish of vinegared rice with sugar and salt, sushi can accompany a huge number of different ingredients such as seafood (often raw) and vegetables.
Its style and presentation can vary widely, but the integral part of the dish is sushi rice, polished white short-grain Japanese rice.
With its origins originally in China, it is believed that sushi was first developed in the Mekong River paddy fields in south-east Asia as a way of preserving fish as it was fermented with rice vinegar, salt and rice, after which the rice was thrown away.
Known as narezushi, it began to gain popularity around around the Yayoi period, 300BC to 300AD.
Japanese cuisine
In Japan, the earliest reference to sushi was in the Yoro Code in 718 and over the next 800 years as sushi developed and the Japanese cuisine evolved, the dish became more prevalent as techniques for cooking rice changed.
Rice began to be boiled instead of steamed and the development of rice vinegar became key to the production of sushi.
It was not until the Muromachi period, 1336-1573, that people began to eat the rice as well as the fish.
Vinegar rather than fermented rice was first used during the Edo period, 1603-1868.
“Hand-rolls are quick and easy to make and do not require any specialist equipment,” says self-taught Japanese cook and demonstrator Kimiko Barber.
Fancy making some sushi yourself at home? Here’s how to give it a go using Kimiko’s recipe.

Hand-rolled sushi
Ingredients
(Makes 8 hand-rolls)
- 4 sheets of Nori, halved
- 400g prepared sushi rice (recipe below)
- 4 tsp wasabi paste
- 200g fish of your choice, cut into 6-7cm long, pencil-sized strips
- 200g vegetables such as cucumber, avocado, blanched carrot, fine green beans, cut into 6-7cm long thin strips, rocket or mustard cress
For the sushi rice:
(Makes 800–840g)
- 400g short-grain rice
- 1 postcard-sized piece of dried kelp
- 6tbsp + 1tsp sushi vinegar (info below)
For the sushi vinegar:
Sushi vinegar is a blend of rice vinegar with sugar and salt. There is a huge range of different formulas and each sushi bar jealously guards their secret recipe. But the most general guide is, using the dry weight of rice as the base measure, 10% of vinegar, 5% of sugar and 1% of salt as shown below.
(Adjust the amount of sugar or salt as preferred)
- 200g rice
- 220ml water
- 20ml rice vinegar
- 10g sugar
- 1/2tsp salt
Method
- Make the sushi rice. Wash the rice under cold running water, drain and set aside for 30 minutes–one hour to let it absorb the moisture.
- Put the washed rice and 440ml of water in a heavy-based saucepan with a tight-fitting lid. Make some slashes in the kelp to release more flavour and place it on top of the rice, then wait for 10–15 minutes before turning on the heat. Cover, bring to the boil over a high heat and, when it just begins to boil, remove and discard the kelp. Reduce the heat to medium and continue cooking for six to seven minutes, then reduce the heat to low and simmer for 12–15 minutes, or until steam stops escaping. Turn off the heat and leave it to steam, with a tea towel wrapped around the lid to stop condensation dripping down on the rice, for 10–15 minutes.
- Moisten a hangiri (see Cook’s Tip below) to stop the rice from sticking. Spread the hot rice in a thin layer in the tub. Sprinkle the sushi vinegar over the rice, then, with a moistened rice paddle or a flat spatula, toss the rice using cut-and-turn strokes (the lateral motion separates and coats the grains without bruising or mashing) and at the same time cool it quickly by fanning. This is a bit tricky to do by yourself, so either get someone else to fan the rice or, if you are on your own, alternate tossing and fanning rather than juggling both.
- Sushi rice is ready when it has cooled to room temperature and the grains are fluffy and glisteningly shiny. Try not to overdo this as the rice will become sticky and heavy. To keep sushi rice from drying out, cover it with a clean, damp cloth until needed, but use it up on the day it is prepared.
- Fold the sheets of nori in half across the grain and pinch along the folded edge, then pull them apart in halves – you should have four rectangular half nori sheets.
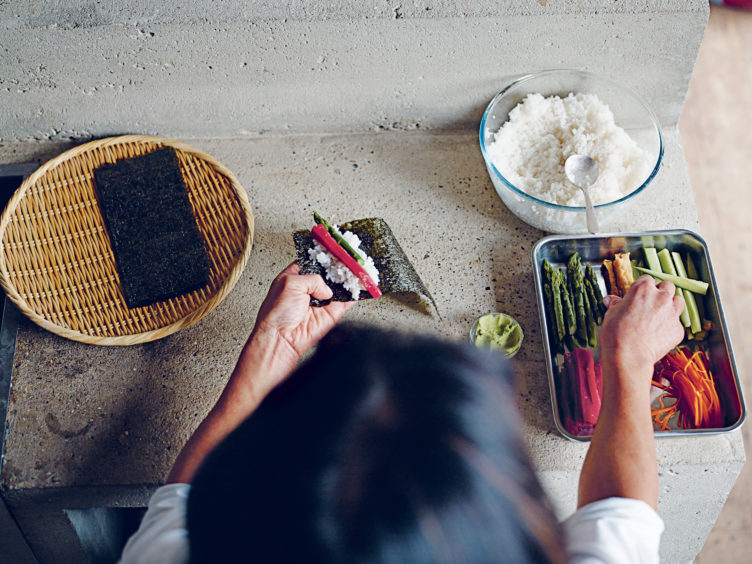
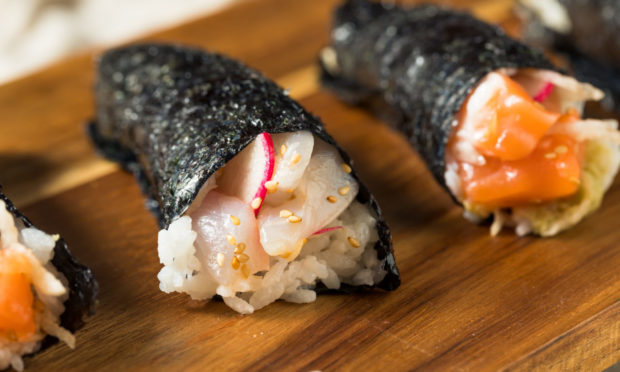
- Hold a piece of halved rectangular nori in your left hand. Put a generous tablespoonful of rice on the top left corner of the nori and flatten it slightly. Dab a small amount of wasabi paste on the rice. Arrange your choice of fillings on top of the rice so that they point diagonally to the top left corner of the nori. Then bring the bottom left-hand corner of the nori towards the top side centre, wrapping it around the rice and fillings, forming a cornet. Repeat to make eight rolls in total.
Cook’s Tip: A hangiri is a specially designed shallow wooden tub, made of Japanese cypress and hooped with copper. Hangiri are expensive, even in Japan, so you can use any wide, shallow, non-metallic tub instead.
Japanese in 7 by Kimiko Barber is published by Kyle Books, priced £17.99.
