Calendar An icon of a desk calendar. Cancel An icon of a circle with a diagonal line across. Caret An icon of a block arrow pointing to the right. Email An icon of a paper envelope. Facebook An icon of the Facebook "f" mark. Google An icon of the Google "G" mark. Linked In An icon of the Linked In "in" mark. Logout An icon representing logout. Profile An icon that resembles human head and shoulders. Telephone An icon of a traditional telephone receiver. Tick An icon of a tick mark. Is Public An icon of a human eye and eyelashes. Is Not Public An icon of a human eye and eyelashes with a diagonal line through it. Pause Icon A two-lined pause icon for stopping interactions. Quote Mark A opening quote mark. Quote Mark A closing quote mark. Arrow An icon of an arrow. Folder An icon of a paper folder. Breaking An icon of an exclamation mark on a circular background. Camera An icon of a digital camera. Caret An icon of a caret arrow. Clock An icon of a clock face. Close An icon of the an X shape. Close Icon An icon used to represent where to interact to collapse or dismiss a component Comment An icon of a speech bubble. Comments An icon of a speech bubble, denoting user comments. Comments An icon of a speech bubble, denoting user comments. Ellipsis An icon of 3 horizontal dots. Envelope An icon of a paper envelope. Facebook An icon of a facebook f logo. Camera An icon of a digital camera. Home An icon of a house. Instagram An icon of the Instagram logo. LinkedIn An icon of the LinkedIn logo. Magnifying Glass An icon of a magnifying glass. Search Icon A magnifying glass icon that is used to represent the function of searching. Menu An icon of 3 horizontal lines. Hamburger Menu Icon An icon used to represent a collapsed menu. Next An icon of an arrow pointing to the right. Notice An explanation mark centred inside a circle. Previous An icon of an arrow pointing to the left. Rating An icon of a star. Tag An icon of a tag. Twitter An icon of the Twitter logo. Video Camera An icon of a video camera shape. Speech Bubble Icon A icon displaying a speech bubble WhatsApp An icon of the WhatsApp logo. Information An icon of an information logo. Plus A mathematical 'plus' symbol. Duration An icon indicating Time. Success Tick An icon of a green tick. Success Tick Timeout An icon of a greyed out success tick. Loading Spinner An icon of a loading spinner. Facebook Messenger An icon of the facebook messenger app logo. Facebook An icon of a facebook f logo. Facebook Messenger An icon of the Twitter app logo. LinkedIn An icon of the LinkedIn logo. WhatsApp Messenger An icon of the Whatsapp messenger app logo. Email An icon of an mail envelope. Copy link A decentered black square over a white square.
Past Times

In pictures: Aberdeen at war seen in colour for the first time

Using the power of artificial intelligence to colourise our precious archive photos, we've put life back into images of the Aberdonians who lived and lost during the war.
Kirstie Waterston
A decontamination and rescue squad practising at Innes Street on August 29 1940 seen in colour for the first time, thanks to AI technology. Image: DC Thomson

There’s a familiarity about photos of Aberdeen at war. We can place the streets and buildings, but the people peering back in black and white remind us that generations have slipped by.

In monochrome ink these faces can fade into the past.

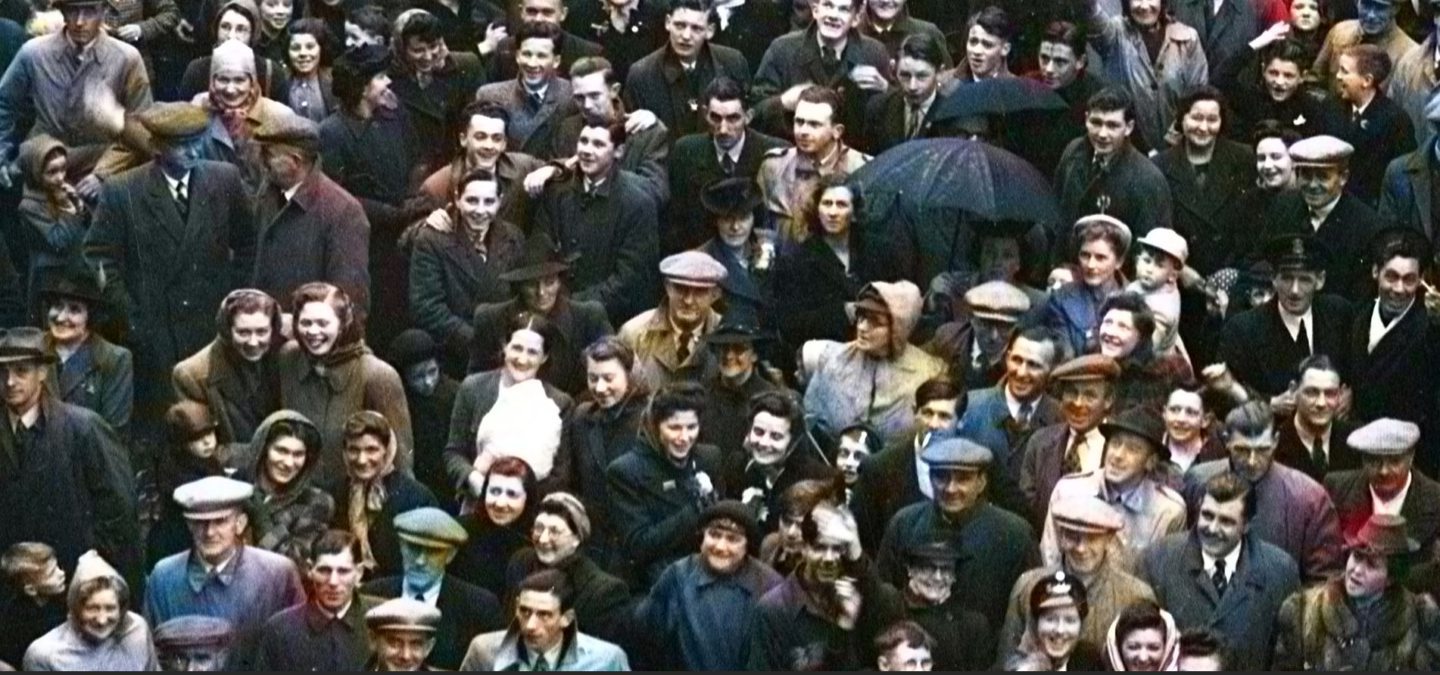
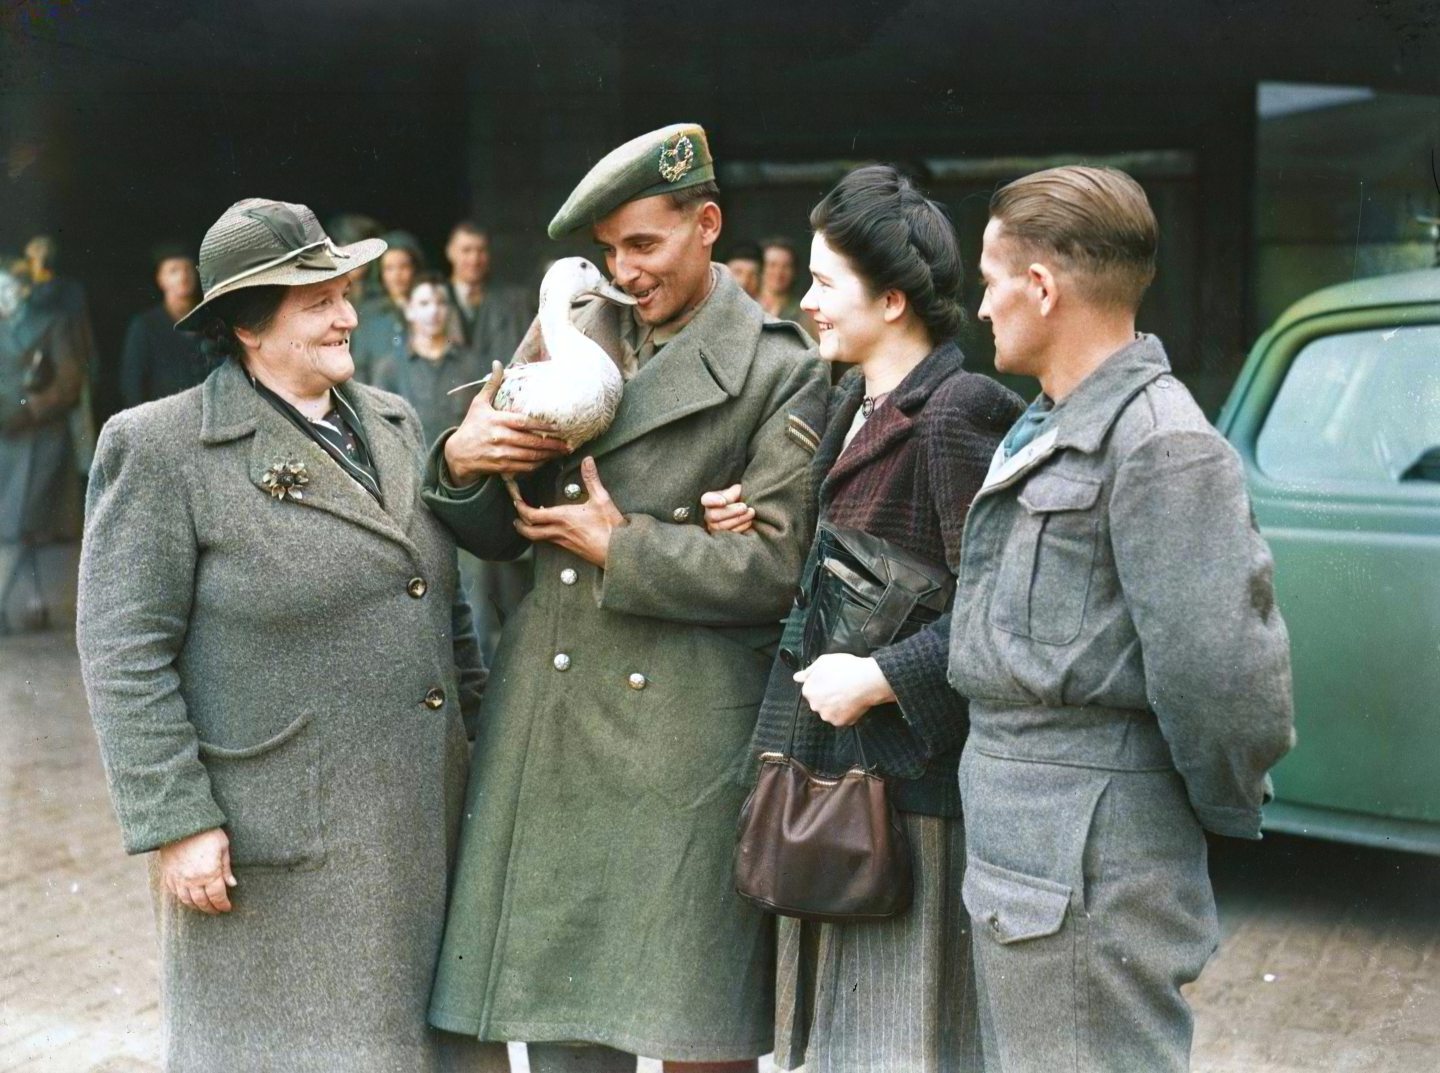
But more than 80 years on, we’ve used advanced artificial intelligence (AI) software to colour these precious photos from our archives of Aberdeen’s darkest hours for the first time.

A high-definition crop of the 5th Gordons shows some furrowed brows as the soldiers march to the unknown. Image: DC Thomson

While the hues may not be exactly as they were, the high definition reveals new details about Aberdeen’s war.

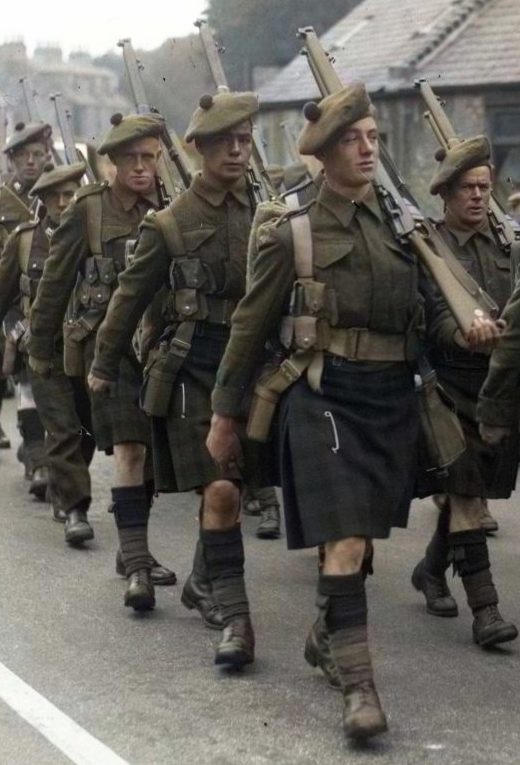
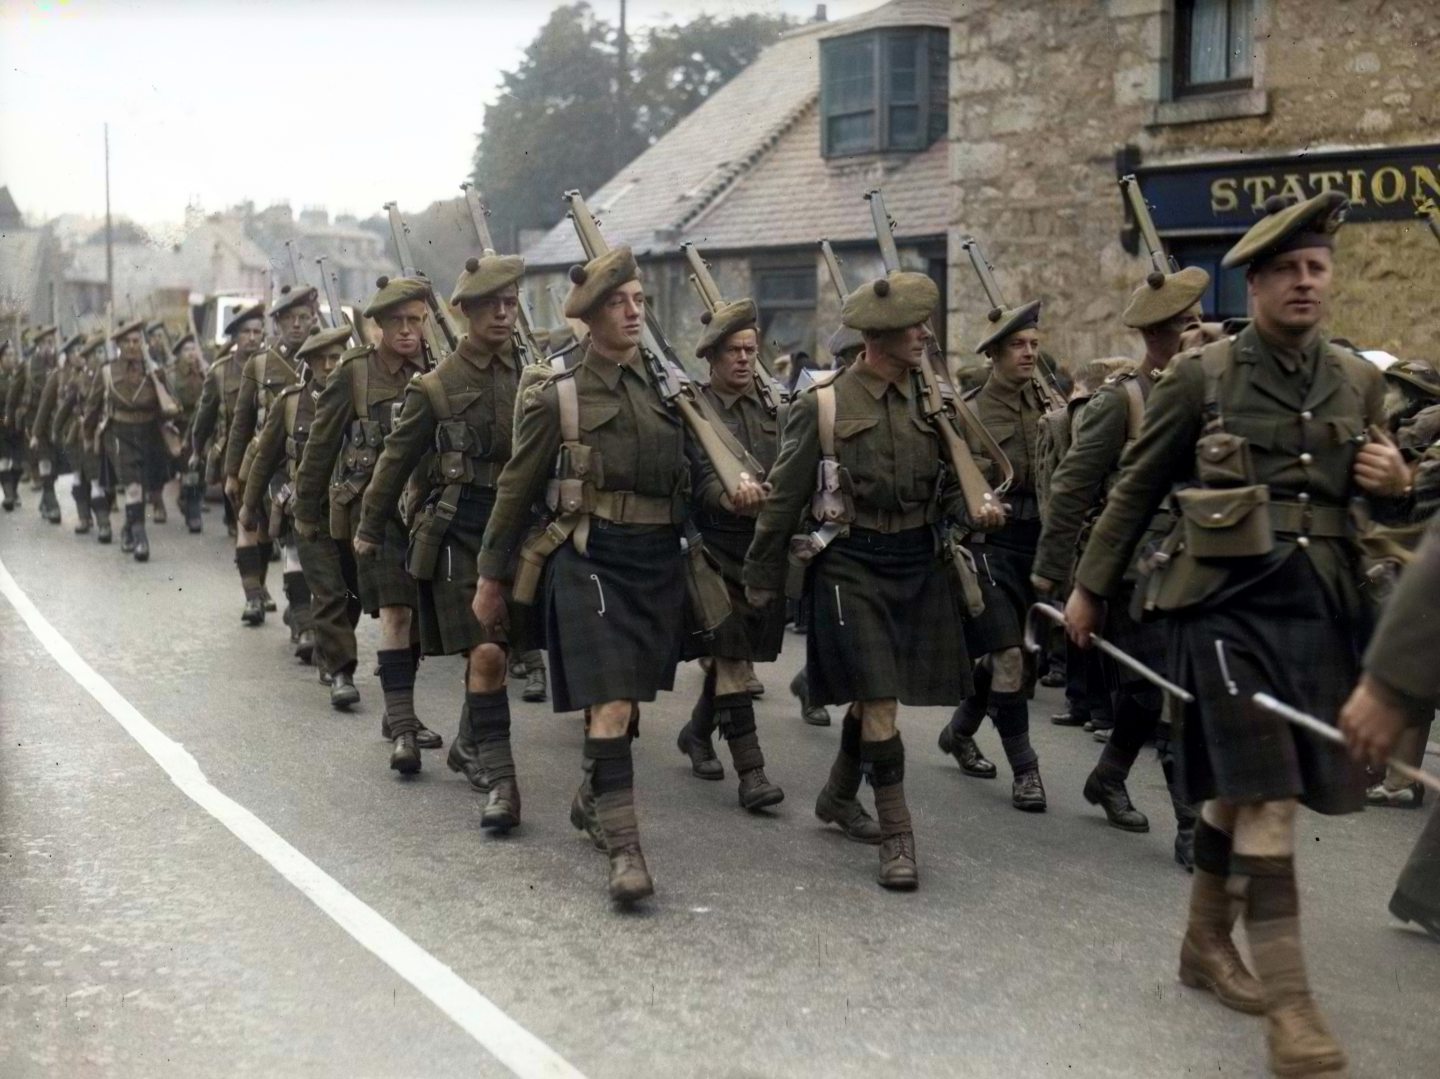
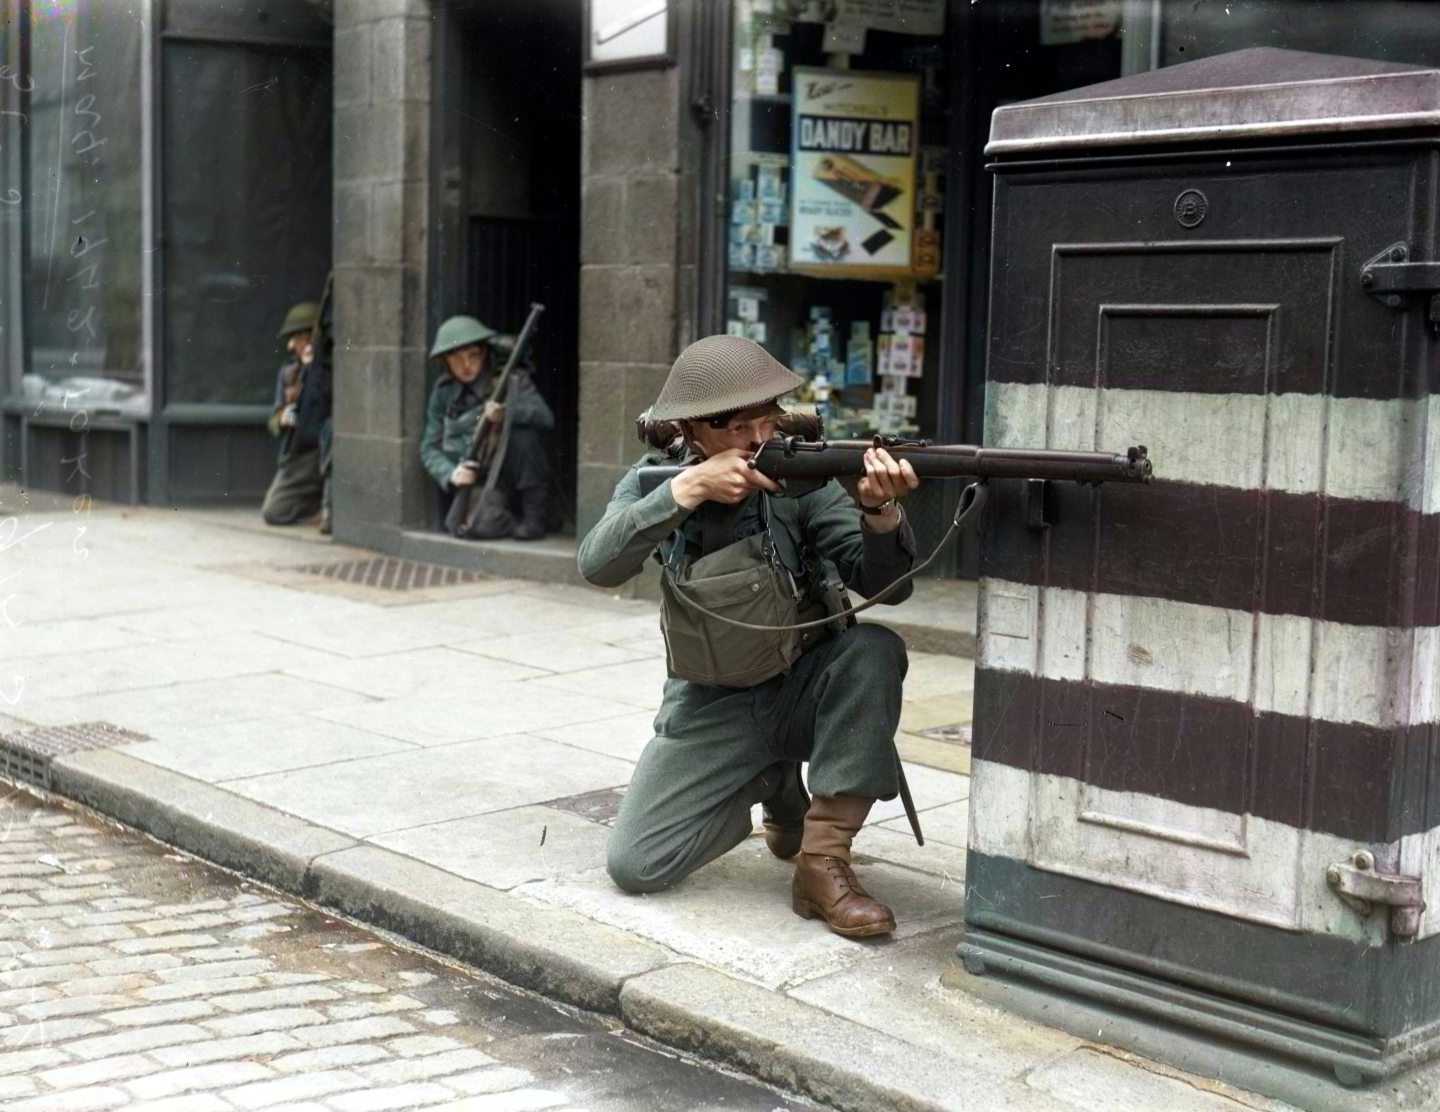
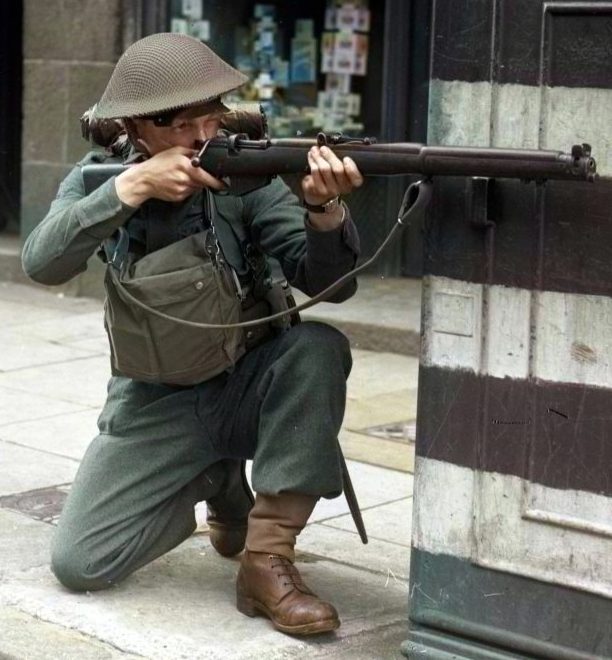
Colourising these archive photos has put colour back in the cheeks of those young Gordon Highlanders bravely marching towards an uncertain fate.

But it’s also brought some life back to the home front, when Aberdonians carried on in the face of tragedy and adversity.

Step back in time through each year of World War II as it affected Aberdeen in colour below…

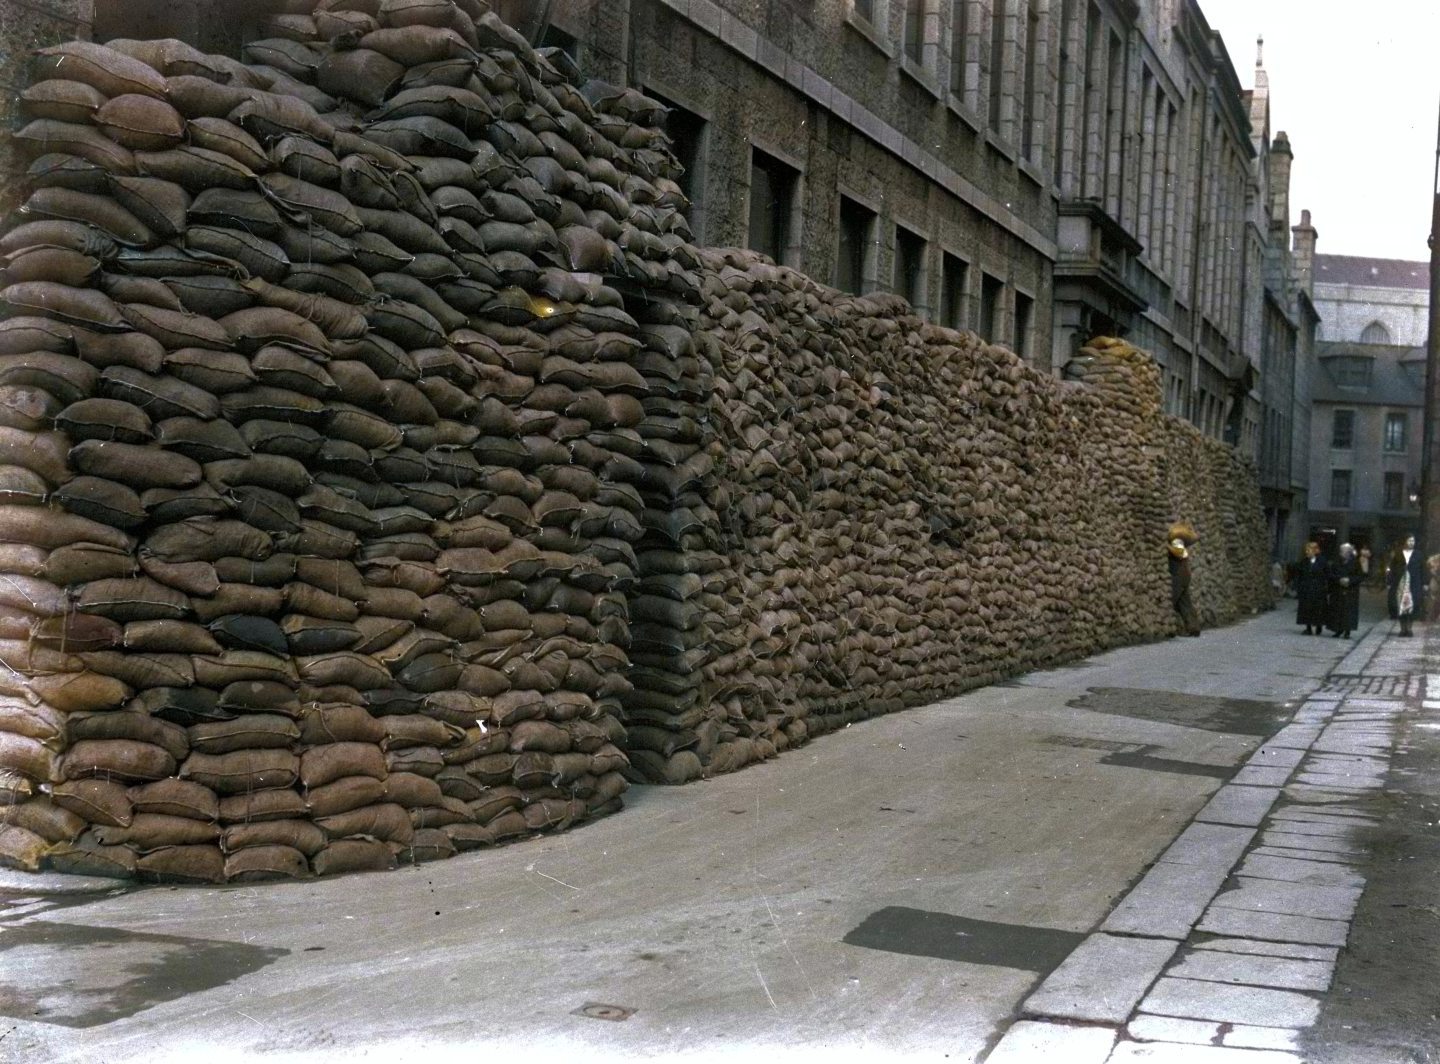
1939: Sandbags and soldiers as Aberdeen prepares for war

On September 1 1939, the Evening Express front page warned the King had signed an order allowing the mobilisation of the Army, Navy and Air Force.

Now in high definition, this colourised photo of the sandbags piled high at the Lodge Walk Police Headquarters on the outbreak of war in September 1939 shows the scale of preparedness in Aberdeen. Image: DC Thomson

If Germany did not retreat from the Polish frontiers, Great Britain would declare war.

Hitler did not respond.

In a five-minute radio broadcast at 11.15am on Sunday September 3, Prime Minister Neville Chamberlain confirmed: “This country is at war with Germany.”

Many people heard the news from the pulpit in church.

The kilted 5th Gordons leaving Bucksburn for the 2.50pm train to head off to war on October 7 1939. In high definition we can see the details of their uniforms and the expressions on their faces. Image: DC Thomson

And back in Aberdeen, special editions of the Evening Express were printed, with crowds congregating around newsboys.

Children evacuated from the Central Belt were already settling in Aberdeenshire, and Aberdeen began to prepare for war on the home front.

1940: The bombs start falling on ‘Siren City’

Although preparations began, life seemed to carry on as normal in Aberdeen after war broke out.

There was a stalemate in Europe during the Phoney War, which lasted until May 1940.

Bomb damage at Forbesfield Road, Aberdeen, where Mrs Sherriffs was killed in August 1940. This was the first and one of the very few pictures of bombing in Aberdeen that was published during the war. The press was censored to protect morale. Image: DC Thomson

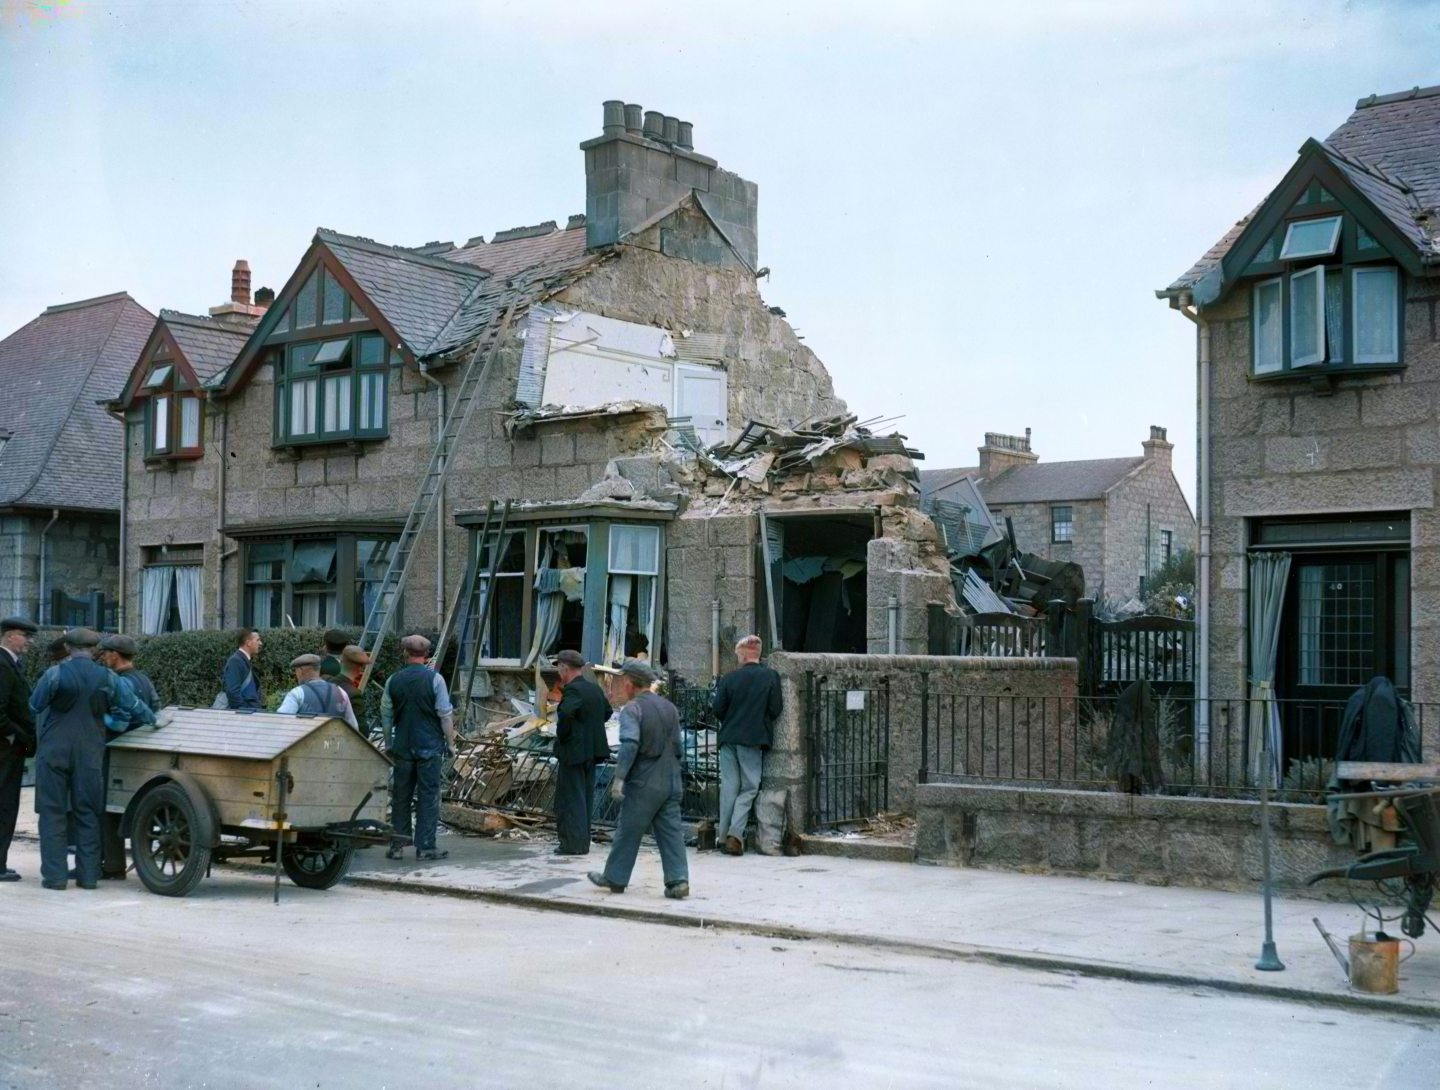
But that all changed in July 1940 when a scatter of bombs fell over Aberdeen.

Due to government press censorship, the newspapers couldn’t report the tragedies at the time in case it affected morale.

The high definition enhancement of this photo of the decontamination and rescue squad practising at Innes Street on August 29 1940 reveals tiny details like the knots in the rope, as well as the fluid trickling into gutters and drains. Image: DC Thomson

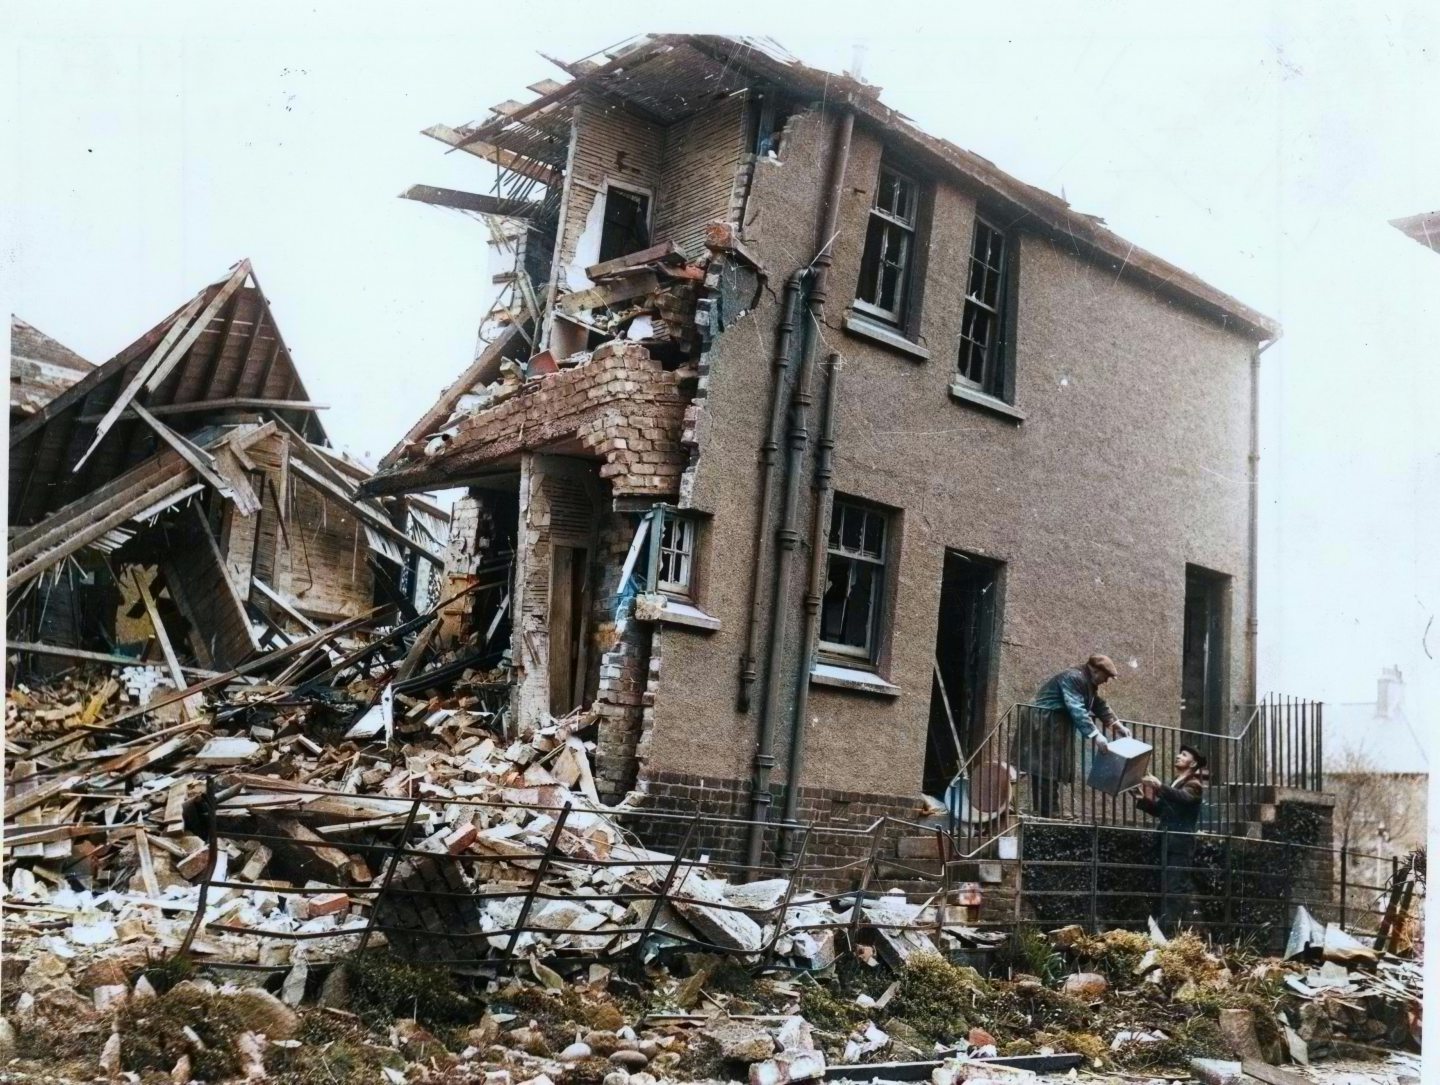
It was the following year before the scale of the tragedies flitting through Aberdeen was made public, with women and children making up the majority of casualties in air raids.

In August 1940, Mrs Sherriffs was killed when a bomb landed on her house on Forbesfield Road, and blew the whole roof into the garden. Her husband narrowly escaped with his life.

The colourisation brings out clearer details like the word ‘police’ on his helmet, and the sinister-looking decontamination suit and gasmask. Image: DC Thomson

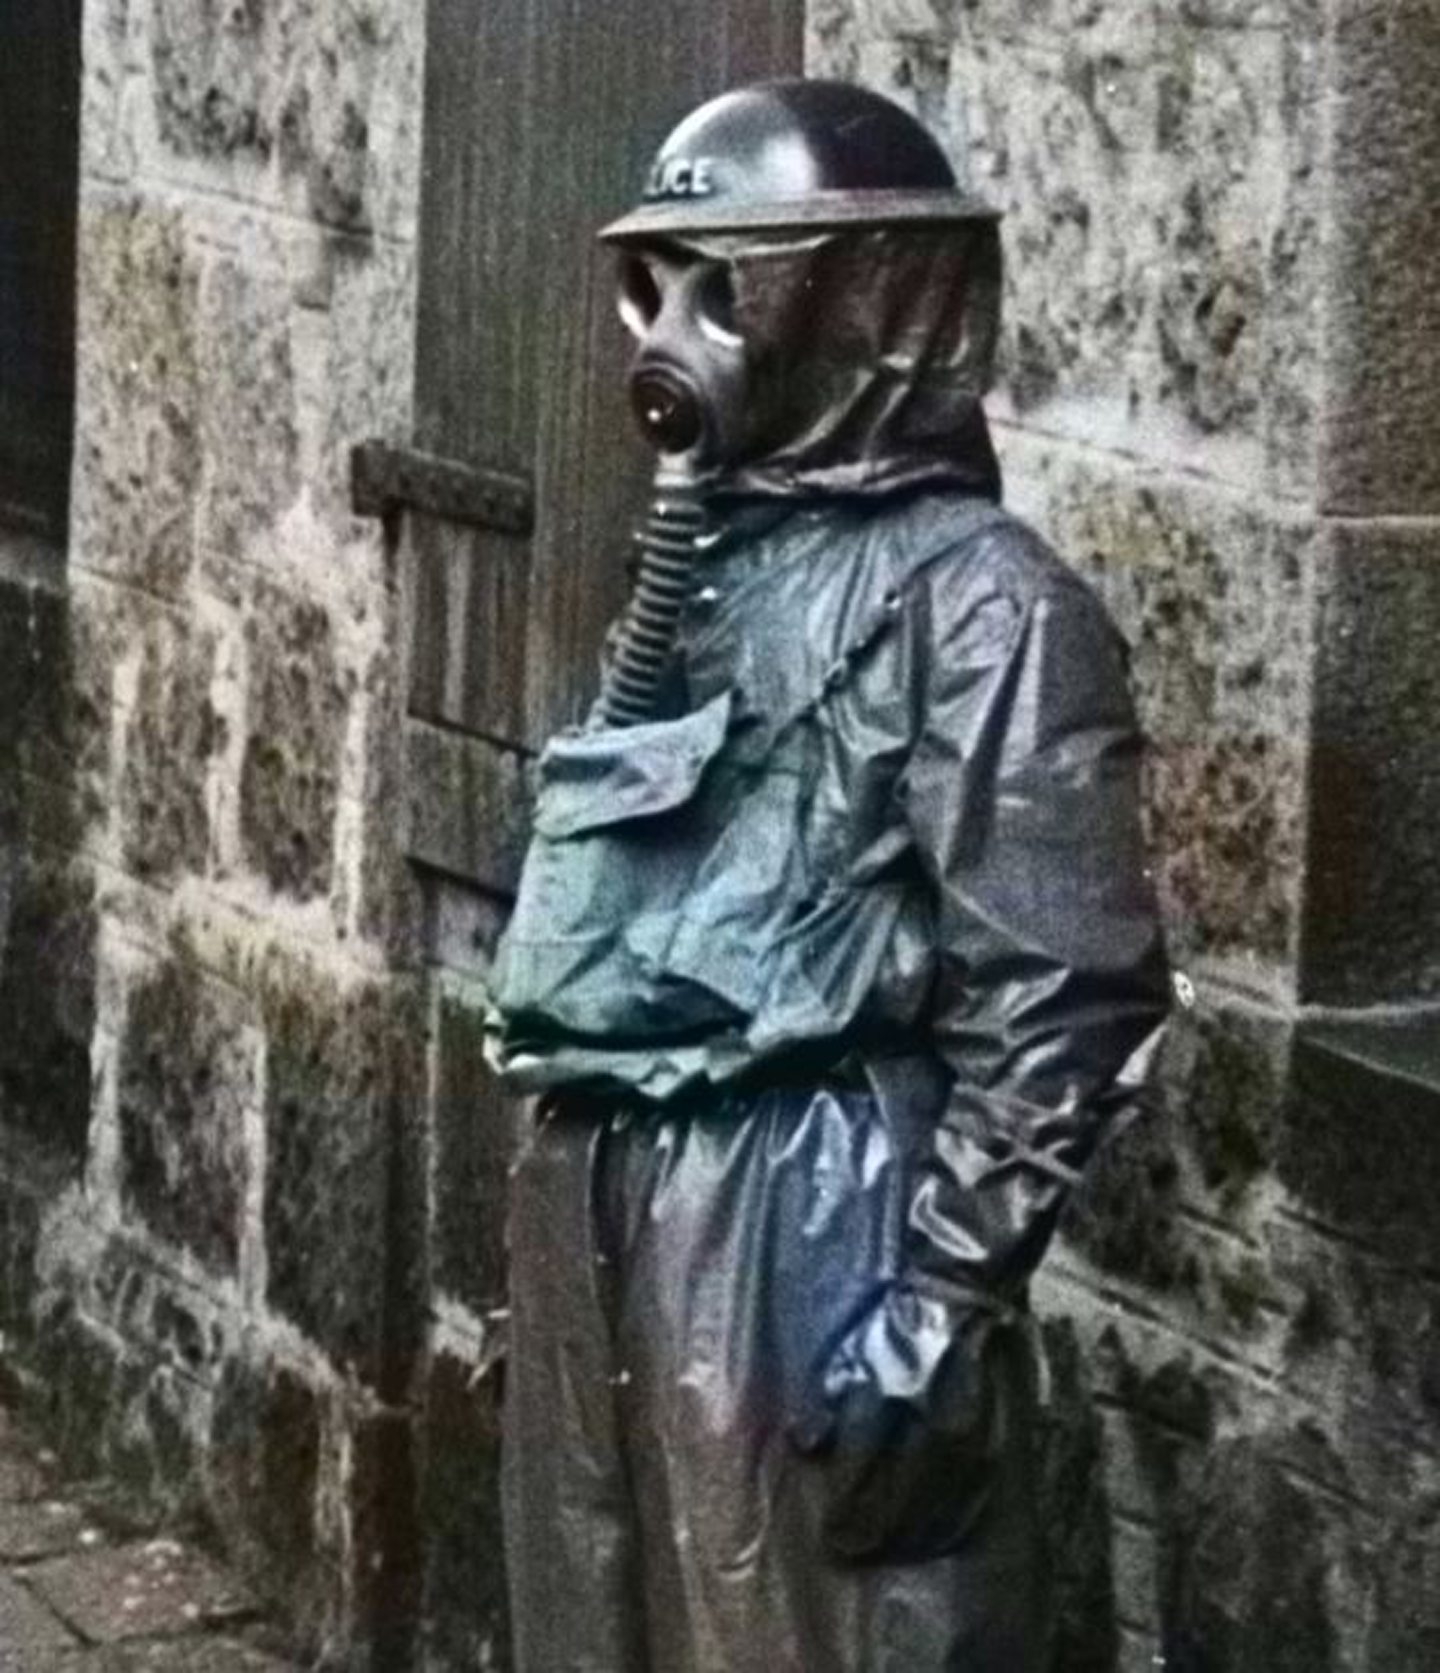
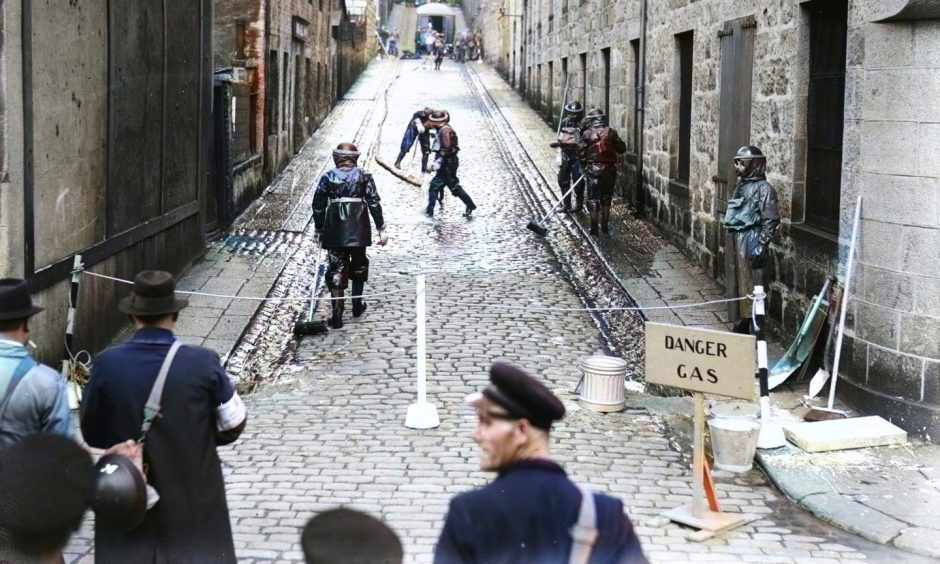
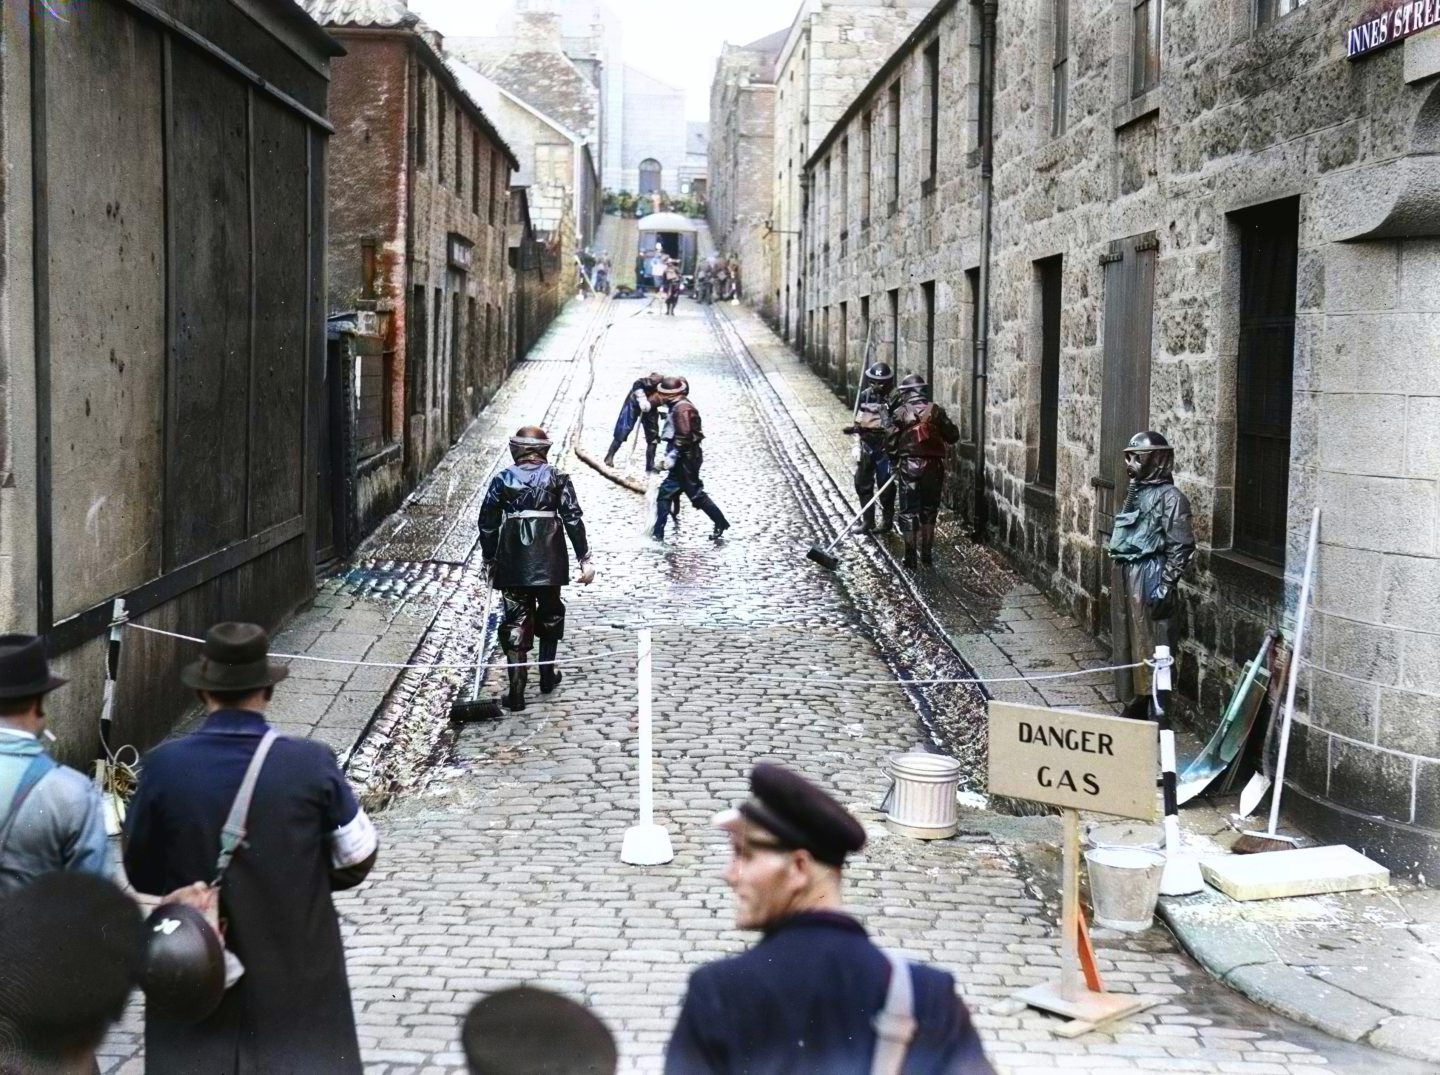
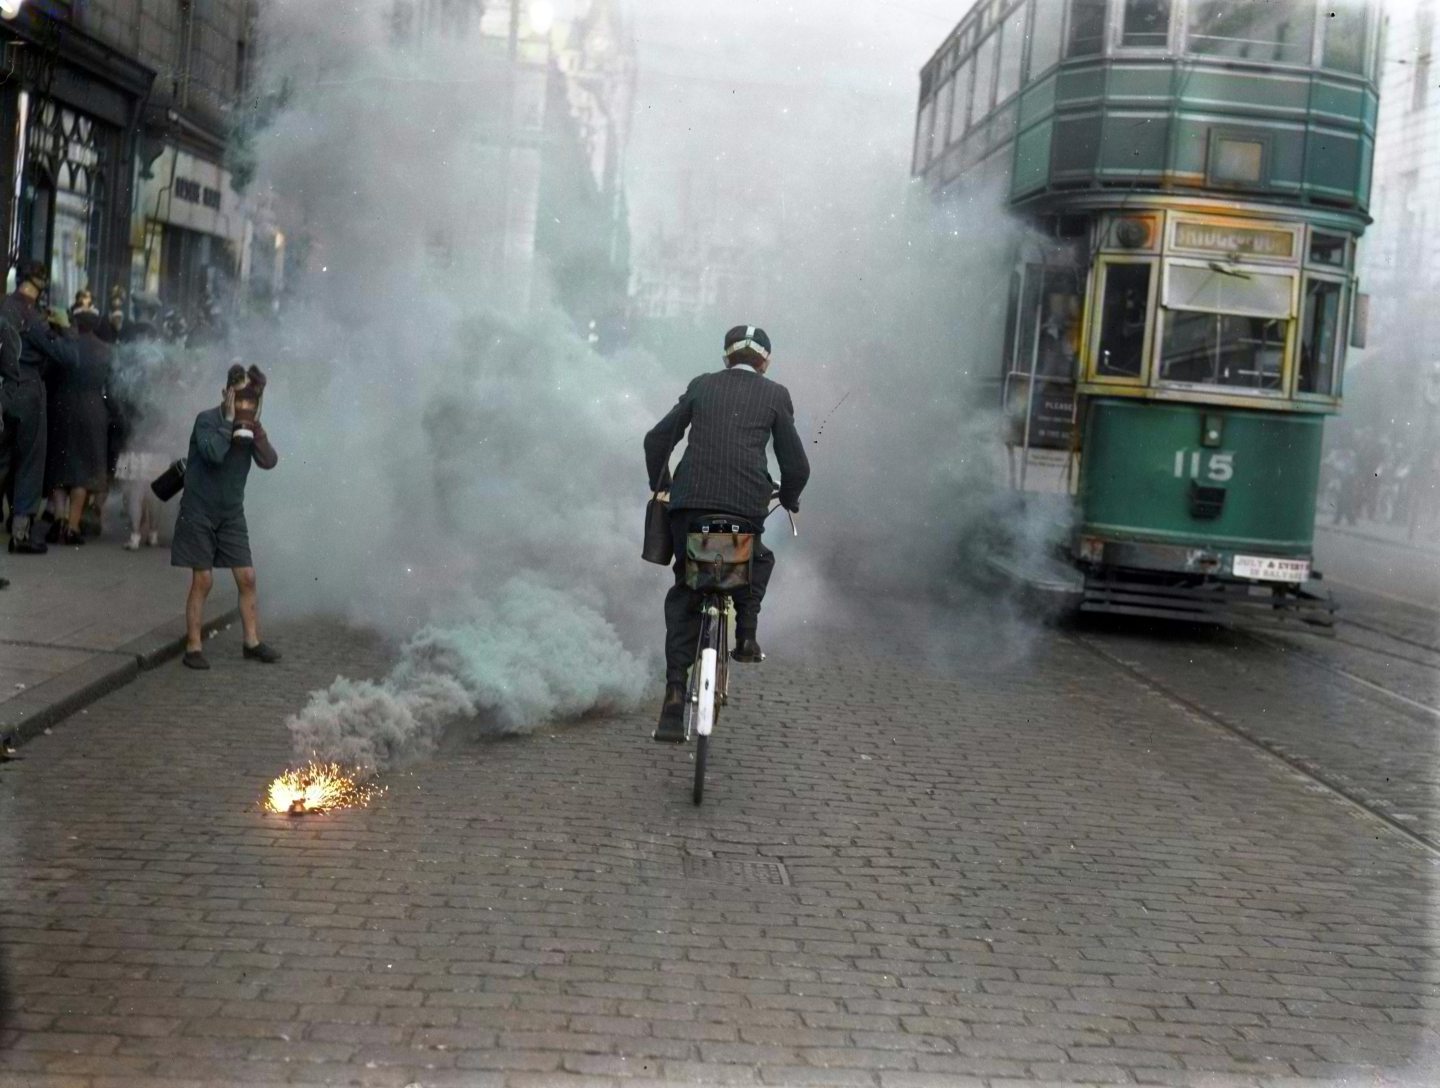
1941: Dramatic gas attack tests carried out in Union Street

As war rolled on, there was a grave fear the Nazis would begin dropping gas bombs on Aberdeen.

In the summer of ’41 large-scale, realistic mock gas attacks took place in the city centre.

Before colourisation we couldn’t see that this lady was holding a pair of glasses while wiping away tears of laughter. The sign behind her is now more clear and reads ‘exercise’, so we know this was a gas test on Union Street in June 1941. Image: DC Thomson

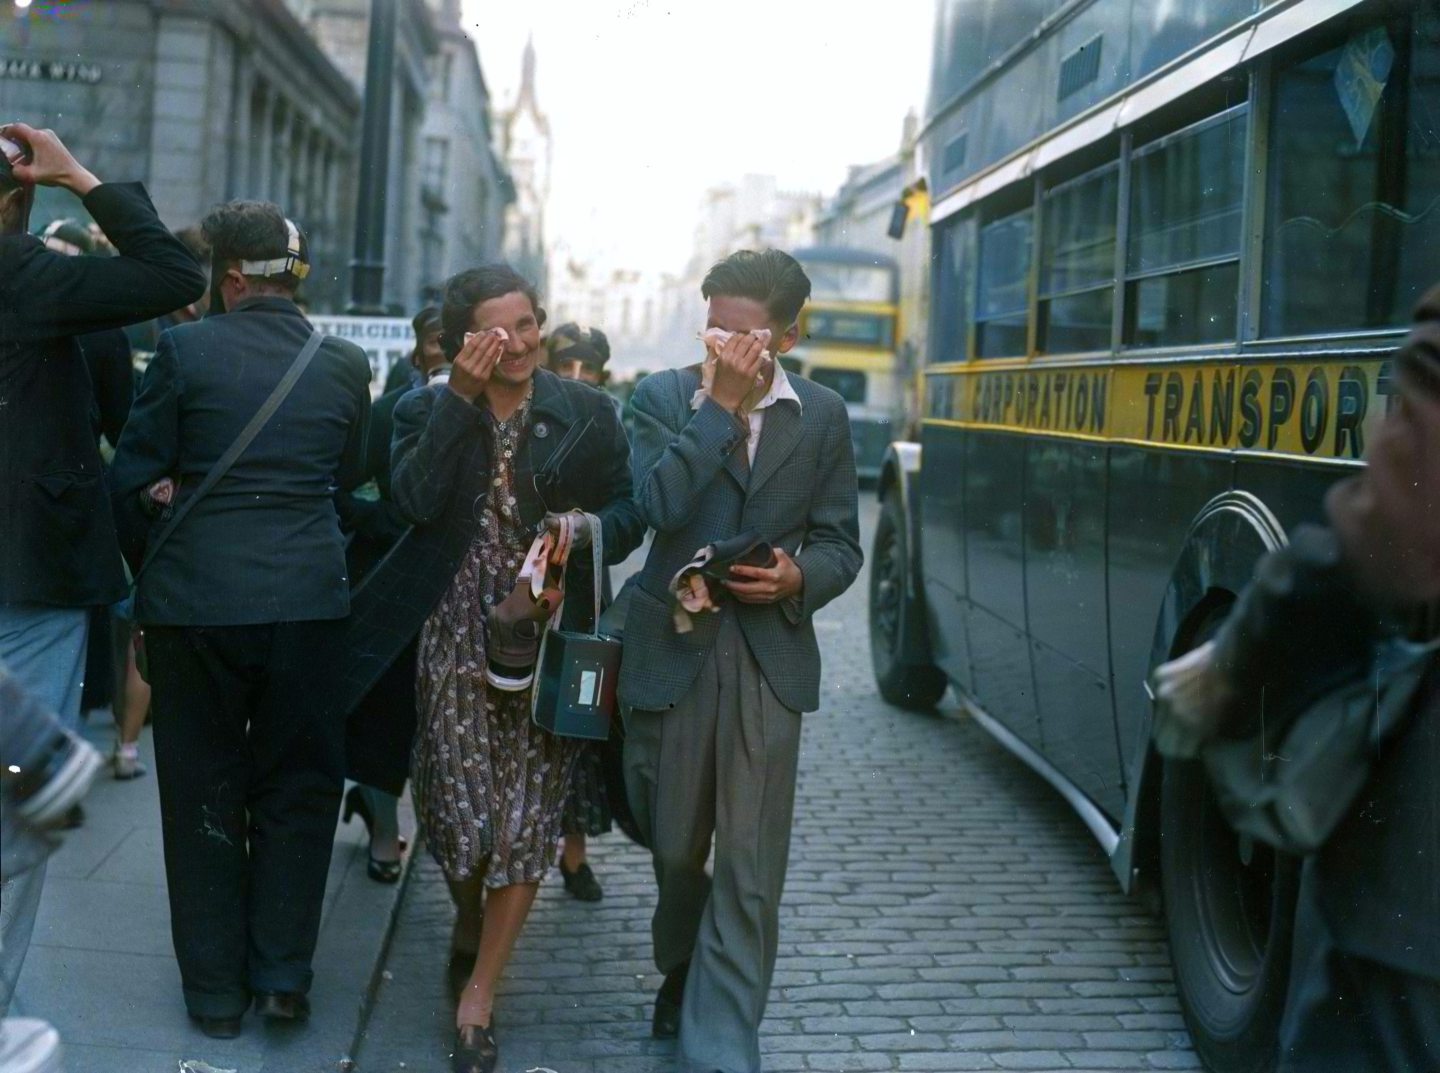
Thousands of Aberdonians wearing gas masks filled the streets from Belmont Street to Broad Street, as clouds of manufactured smoke poured from nearby buildings to simulate gas.

Over the course of an hour, various smoke bombs went off, creating apocalyptic scenes as trams eerily emerged from clouds of smoke.

In HD, we can now see the glasses in her left hand along with her gasmask, while her handbag is tucked behind her arm. We can see the checked detail in the gentleman’s suit fabric. Image: DC Thomson

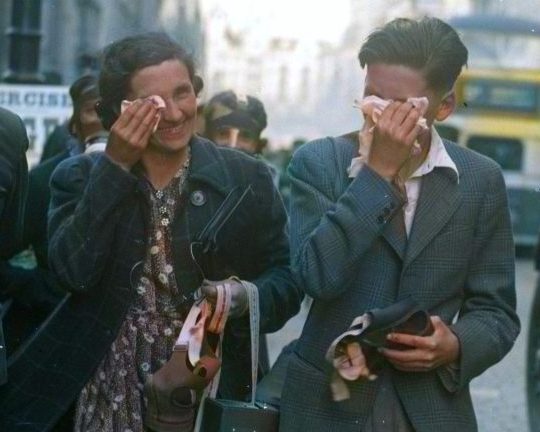
People who did not take their gasmasks out with them learned a hard lesson as tears streamed from their stinging eyes.

But the gas test caught everyone’s imagination and was taken in “rare spirit” all round.

Another gas test in 1941. Now enhanced, we can tell the figure on the left is a schoolboy wearing shorts, rather than a girl in a skirt as previously thought. The tramcar has successfully been picked out by AI in the correct colour, green, and its destination board reads Bridge of Don. Image: DC Thomson

1942: Cathedral railings ripped up for scrap iron

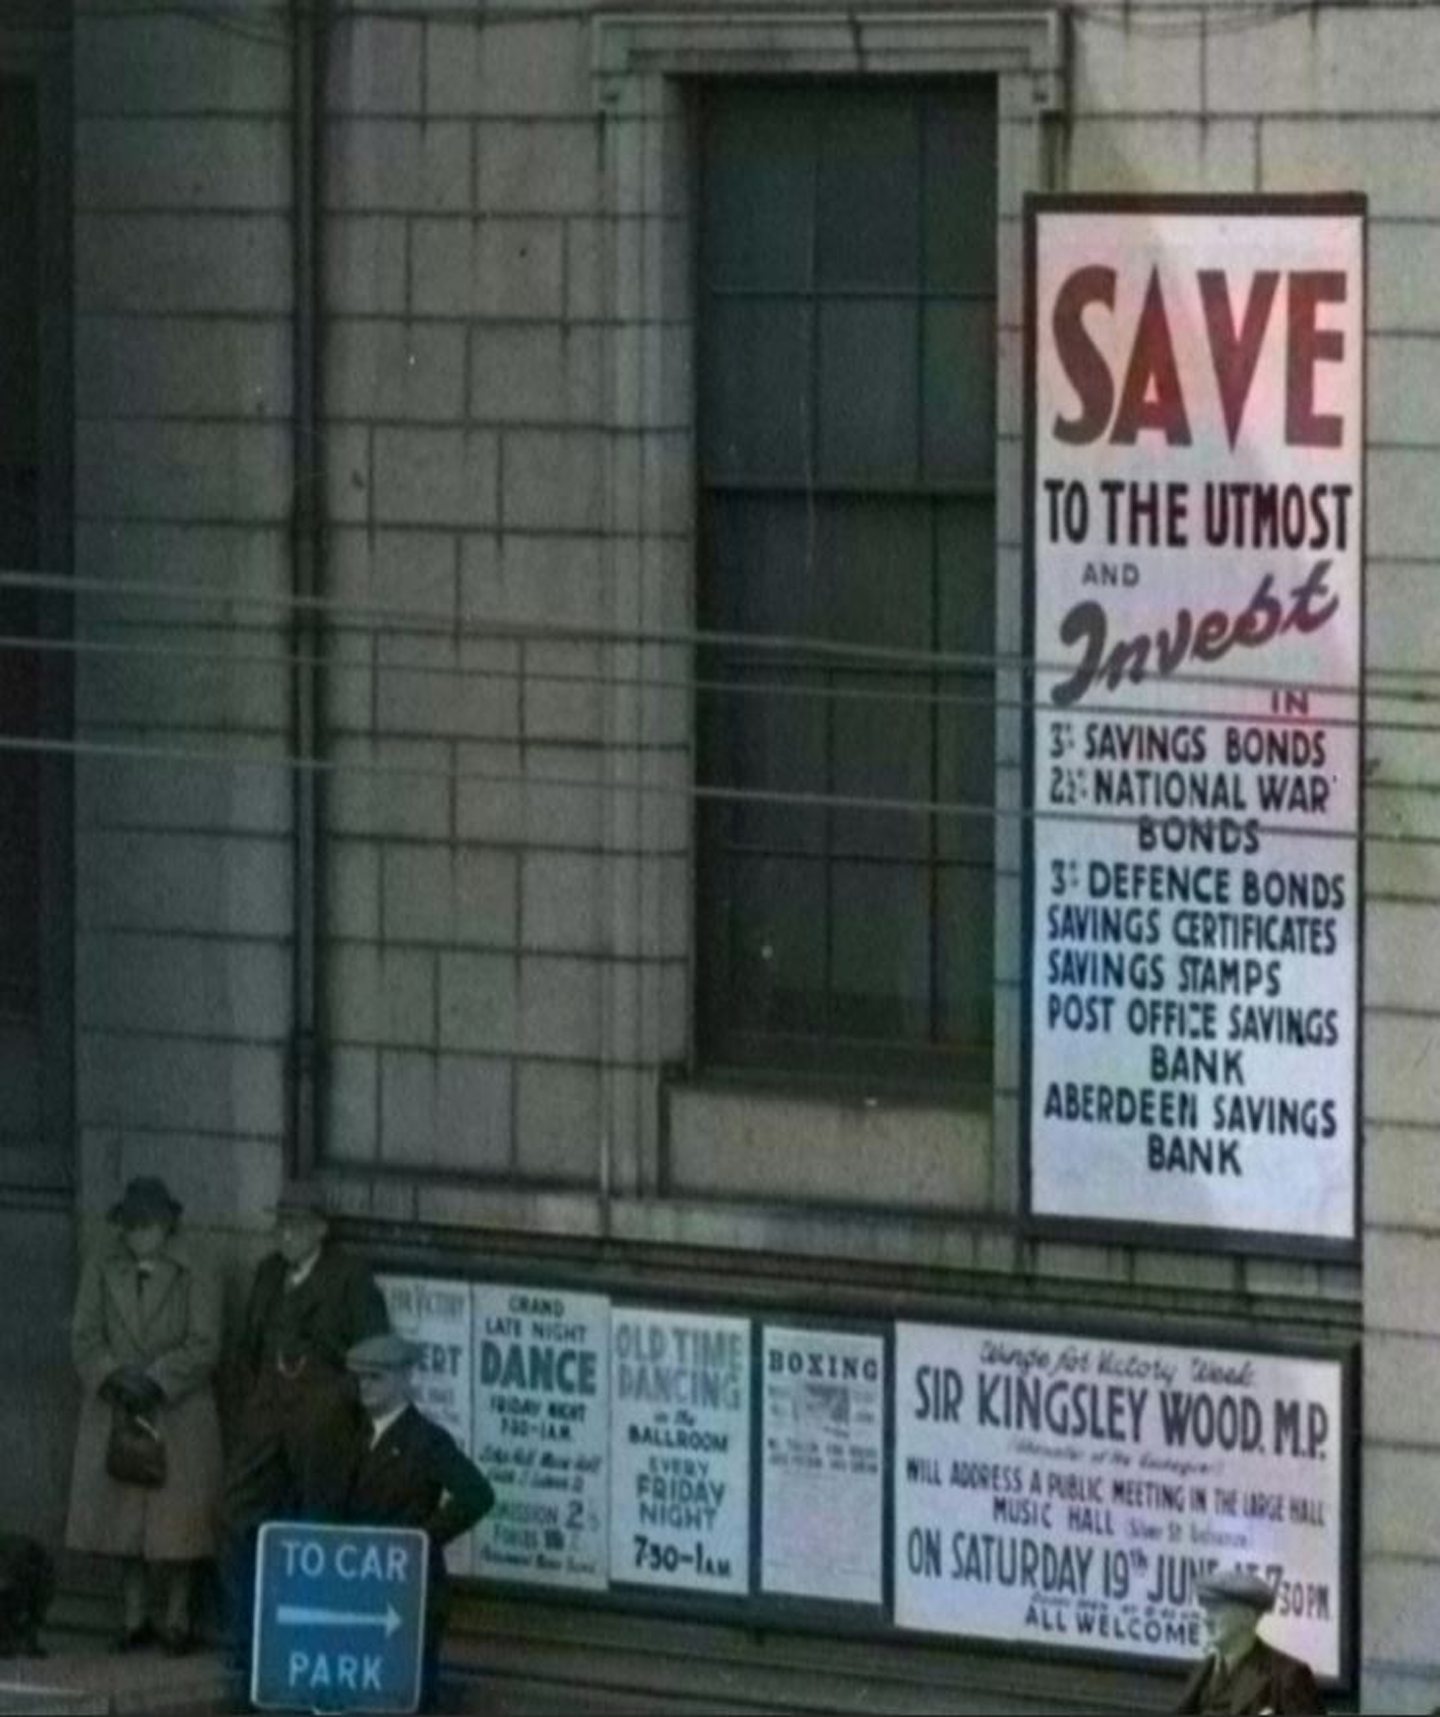
With no end in sight, the war effort on the home front increased with the removal of railings from properties and cemeteries up and down the country.

Aberdeen was no exception, and in 1942 workers began dismantling railings in the city’s cemeteries, with 50 tons collected from St Machar’s Cathedral alone.

St Machar’s Cathedral is familiar to us all, but in high definition, this photo of the removal of the railings for scrap in October 1942 looks like it was taken yesterday. A young boy looks on from the left, where before he was camouflaged in black and white. Image: DC Thomson

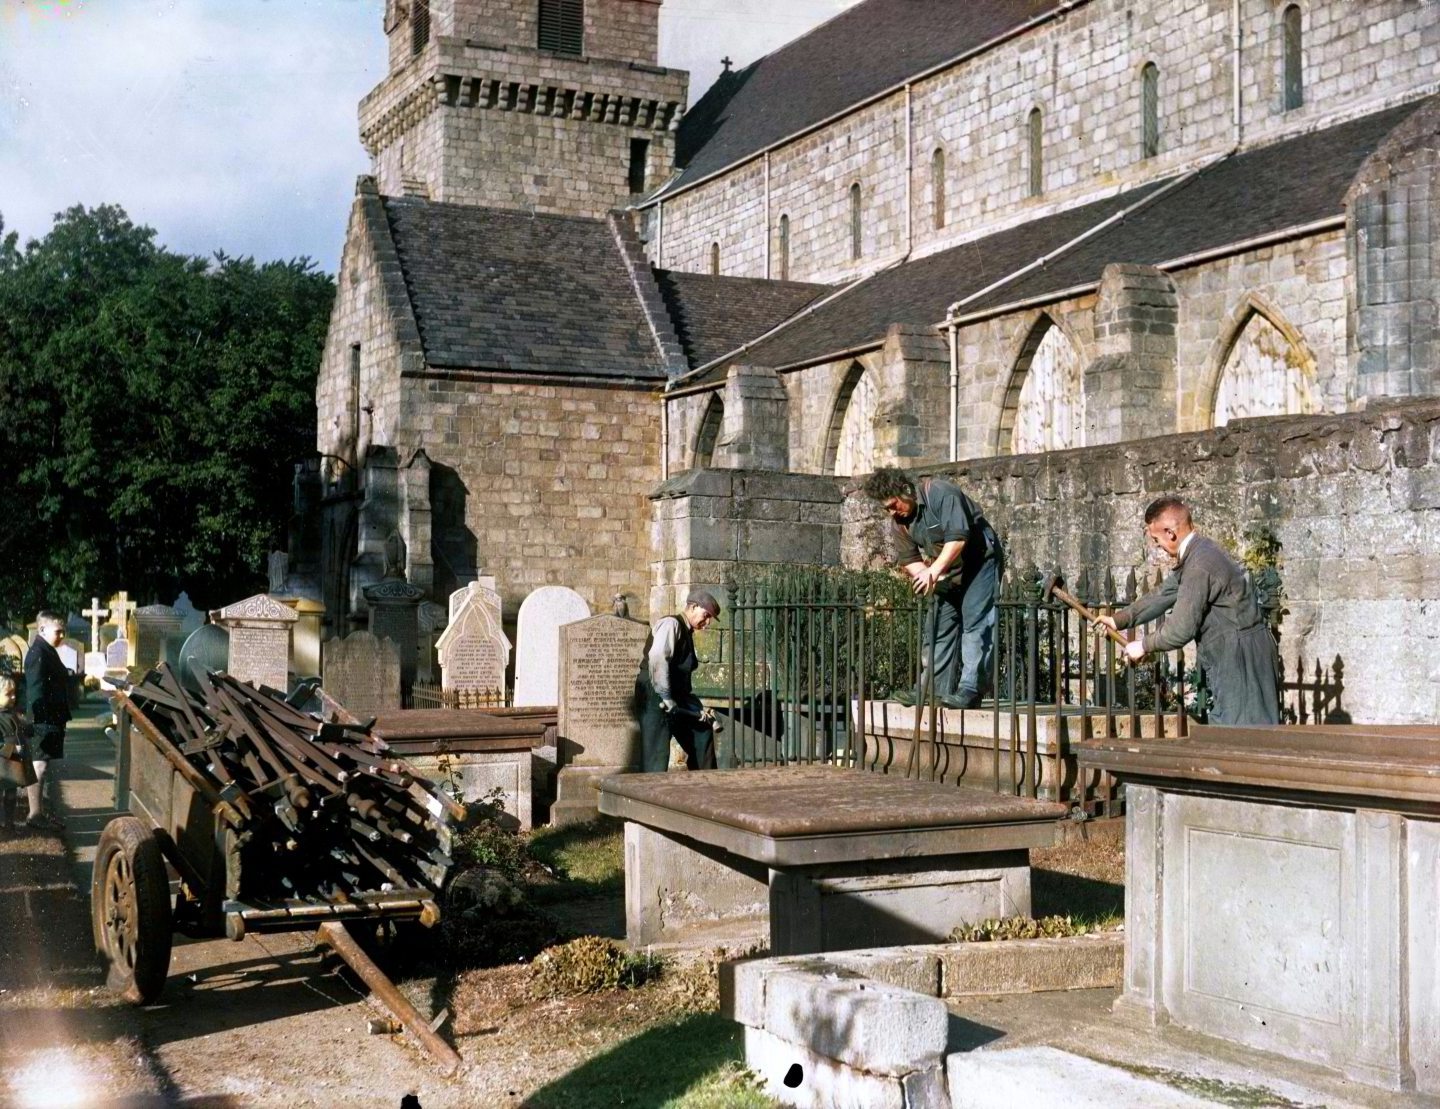
It was widely believed the iron could be melted down and used for the manufacture of weapons.

With the benefit of hindsight, it’s believed much of the sacrifice of railings was in vain, as there was far more than ever needed.

A colourised photo of the Home Guard taking part in an invasion exercise in Aberdeen on May 31 1942. The detail on the soldier’s uniform is much clearer. Image: DC Thomson

But it was fantastic propaganda and a unifying act which made people feel they were doing “their bit” back home in Aberdeen.

In reality, a lot of scrap metal was squirreled away in railway sidings out of view.

The uniform isn’t a true khaki, but a close-up crop in high definition shows him closing one eye as he takes aim. Image: DC Thomson

1943: Bombs continue to fall as Aberdeen faces darkest day

But come 1943, even press censorship could not hide the true devastation of Aberdeen’s darkest day.

In the space of just 44 minutes on April 21, 127 bombs fell, damaging or destroying more than 12,000 homes and killing 98 civilians and 27 soldiers.

Cattofield was very badly damaged during the Aberdeen blitz in April 1943. Here a man tries to salvage belongings from the wreckage. The enhanced image brings out details like the skeletal laths where the plaster has blown off, as well as the contrast of the red bricks. A wicker chair sits on its side behind the man. Image: DC Thomson

Parts of Aberdeen around Powis, Causewayend, Cattofield and Kittybrewster were particularly badly affected.

Some entire families were wiped out in a night of terror and tragedy.

The colourisation brings out the smart blue of the RAF uniforms as the airmen march down Union Street for the wings for victory parade in June 1943. Image: DC Thomson

Peter Nicol, who was staying at a friend’s house in Cattofield during the bombing, said: “Cattofield not only had a rain of bombs, but the street was raked by a hail of bullets.

“What a scene of devastation hit my eyes – the house next door had simply disappeared.”

In high definition, the signs on the Music Hall can be seen in great detail including a speech by Sir Kingsley Wood MP, an advert for boxing and ‘old time dancing’ in the ballroom. Image: DC Thomson

1944: Aberdeen’s ‘stay at home holidays’

The summer of 1944 brought the D-Day landings, which marked the beginning of the end of the Second World War.

In what was the biggest air and sea operation of all time, the Allies landed around 156,000 troops on the beaches of Normandy.

People congregate around a news vendor on the corner of Union Street and Bridge Street to get the latest D-Day news in June 1944. Colourisation reveals the man to the left of the crowd is an airman, you can now see the sergeant stripes on his sleeve. But the colours aren’t perfect; although it’s picked out the horse’s colouring accurately, AI has failed to identify the red postbox. Image: DC Thomson

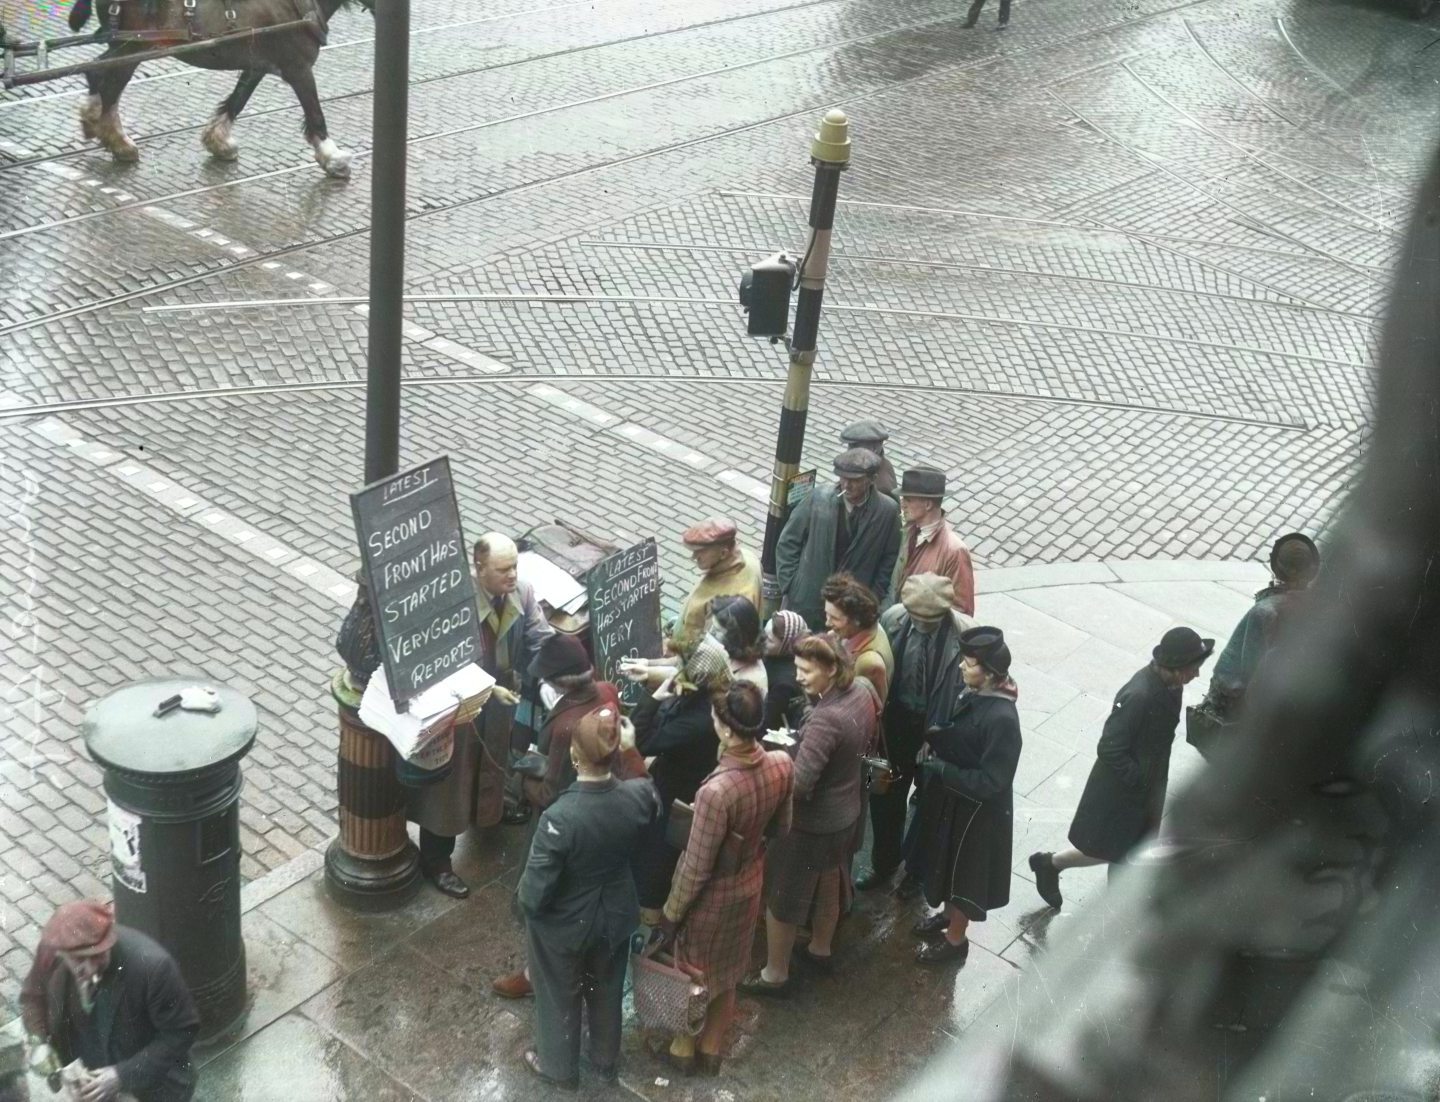
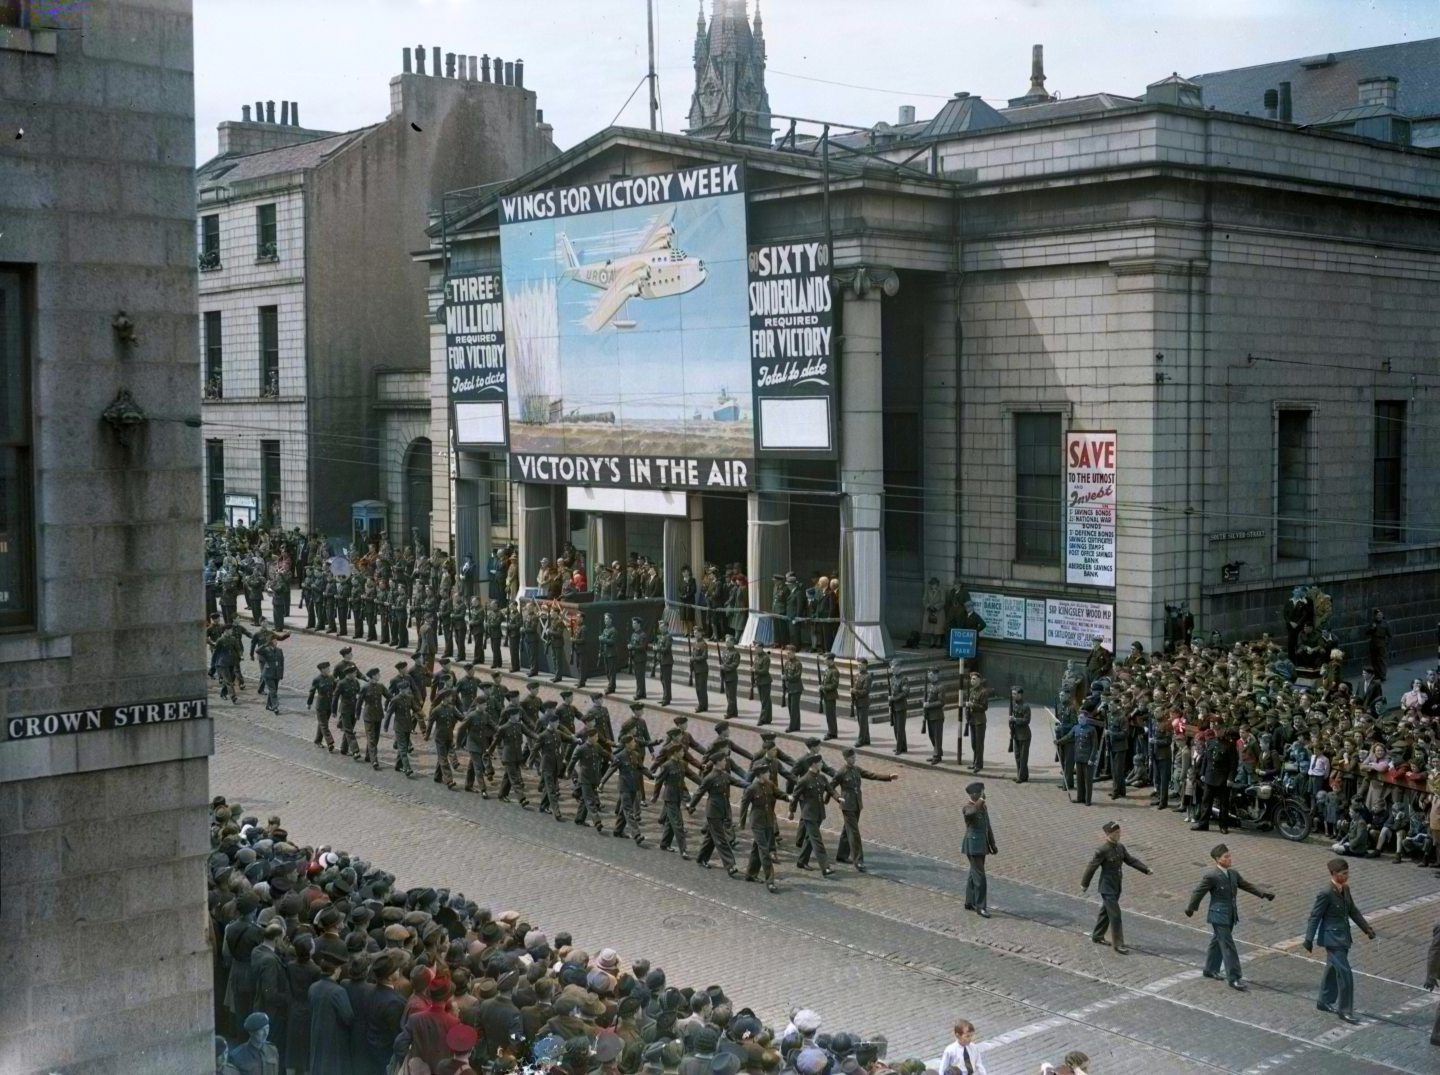
Back in Aberdeen, in the days before the internet or even phones in every home, people congregated around news vendors to find out the latest from the front line.

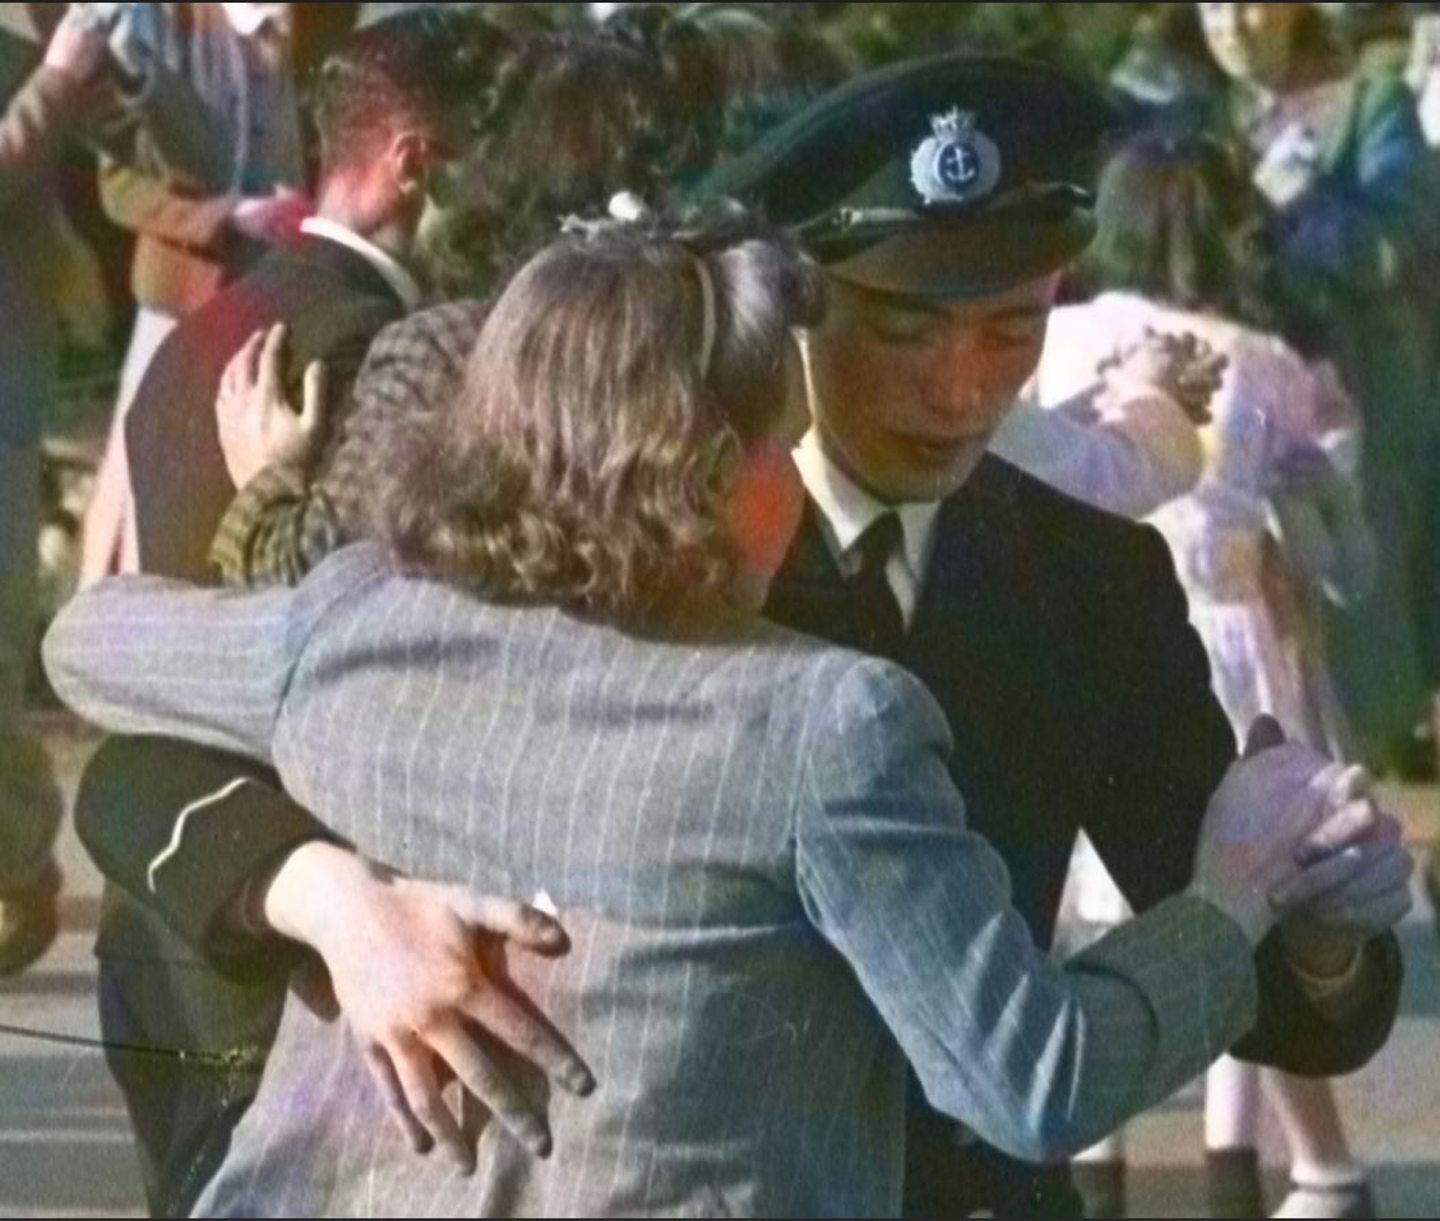
But there was a bit of light relief in the dirge of war, when Aberdeen held its ‘stay at home holidays’ week in July ’44.

There was a shortage of men for dances during Aberdeen ‘stay at home holidays’ week in July 1944, but nevertheless it was a happy scene. One of the few men dancing is in the Navy, we can see the anchor on his cap in HD. The women’s clothing is very much in the restricted wartime utility style. Image: DC Thomson

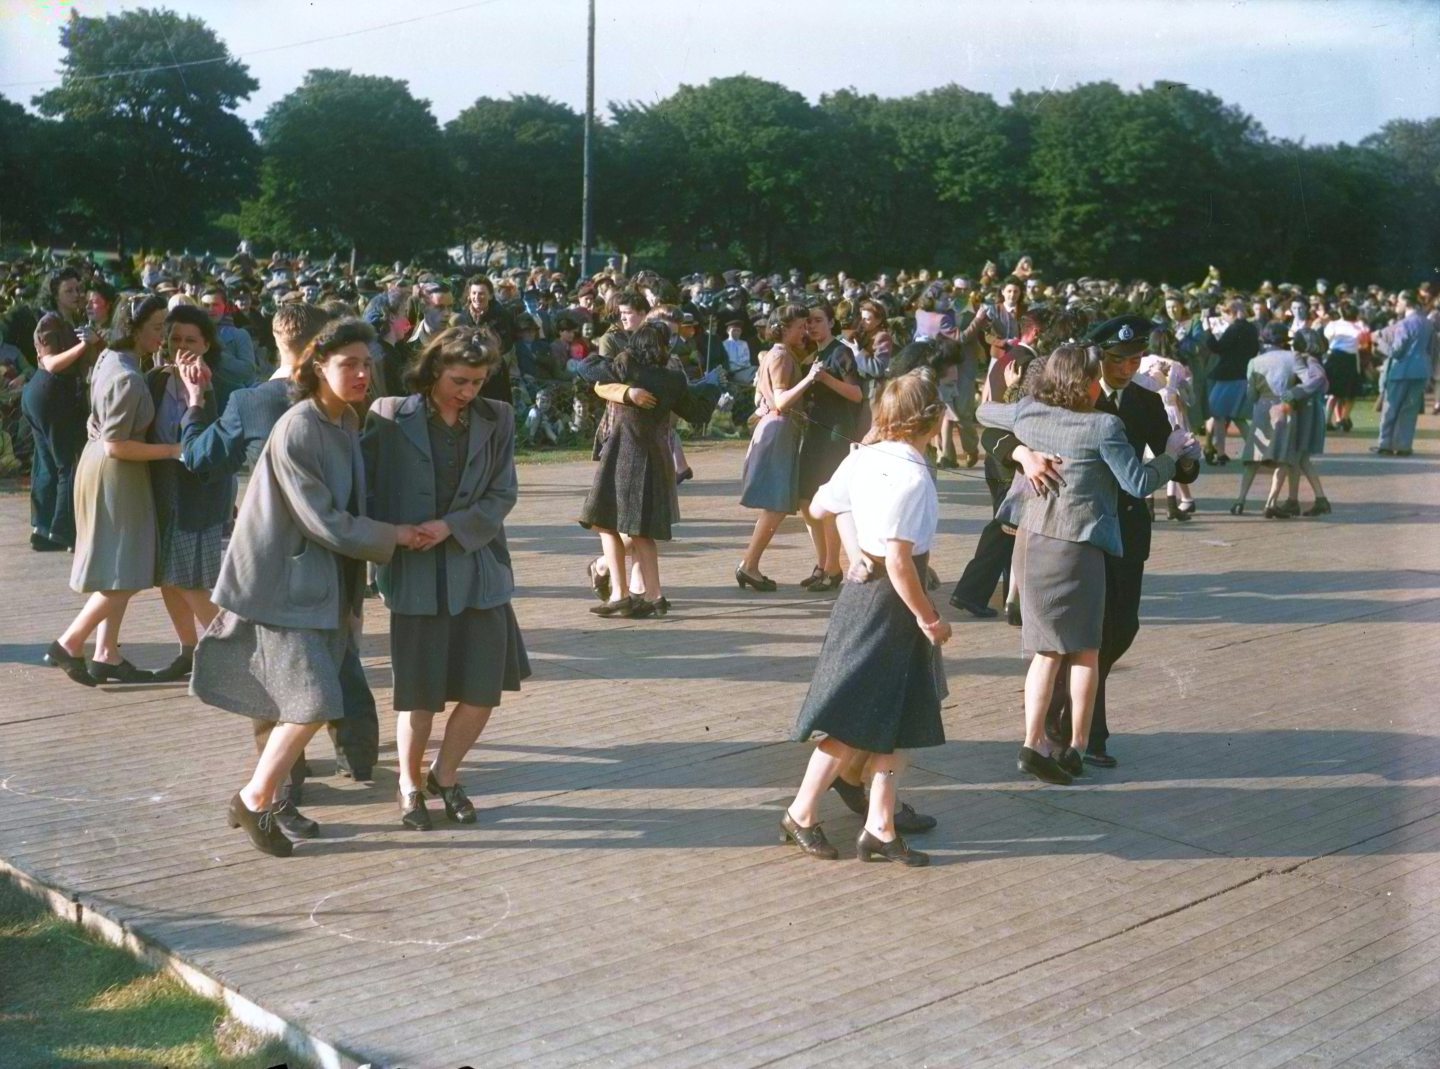
A plethora of activities and attractions were held throughout the city, including swimming galas at the city’s pools, picnics and dancing at Hazlehead Park.

But the lack of men to participate in dances was a reminder that war was never far away.

A close-up of the man shows a handsome young lad in his naval dress. Image: DC Thomson

1945: Relief as tragedies turn to triumph with end of war

It had been a long war of sorrow and sacrifice, rationing and restrictions, but hope was on the horizon by spring 1945.

The Evening Express headlines carried more positive headlines about the allies.

The high definition shows lots of smiling faces in the victory parade in Aberdeen on May 13 1945. You can even see the parting in some of the men’s hair. Image: DC Thomson

On May 2 the front page declared “cracked Reich on its last legs”, two days later it read “Nazi army now only a rabble”. And on May 7, simply: “Unconditional surrender.”

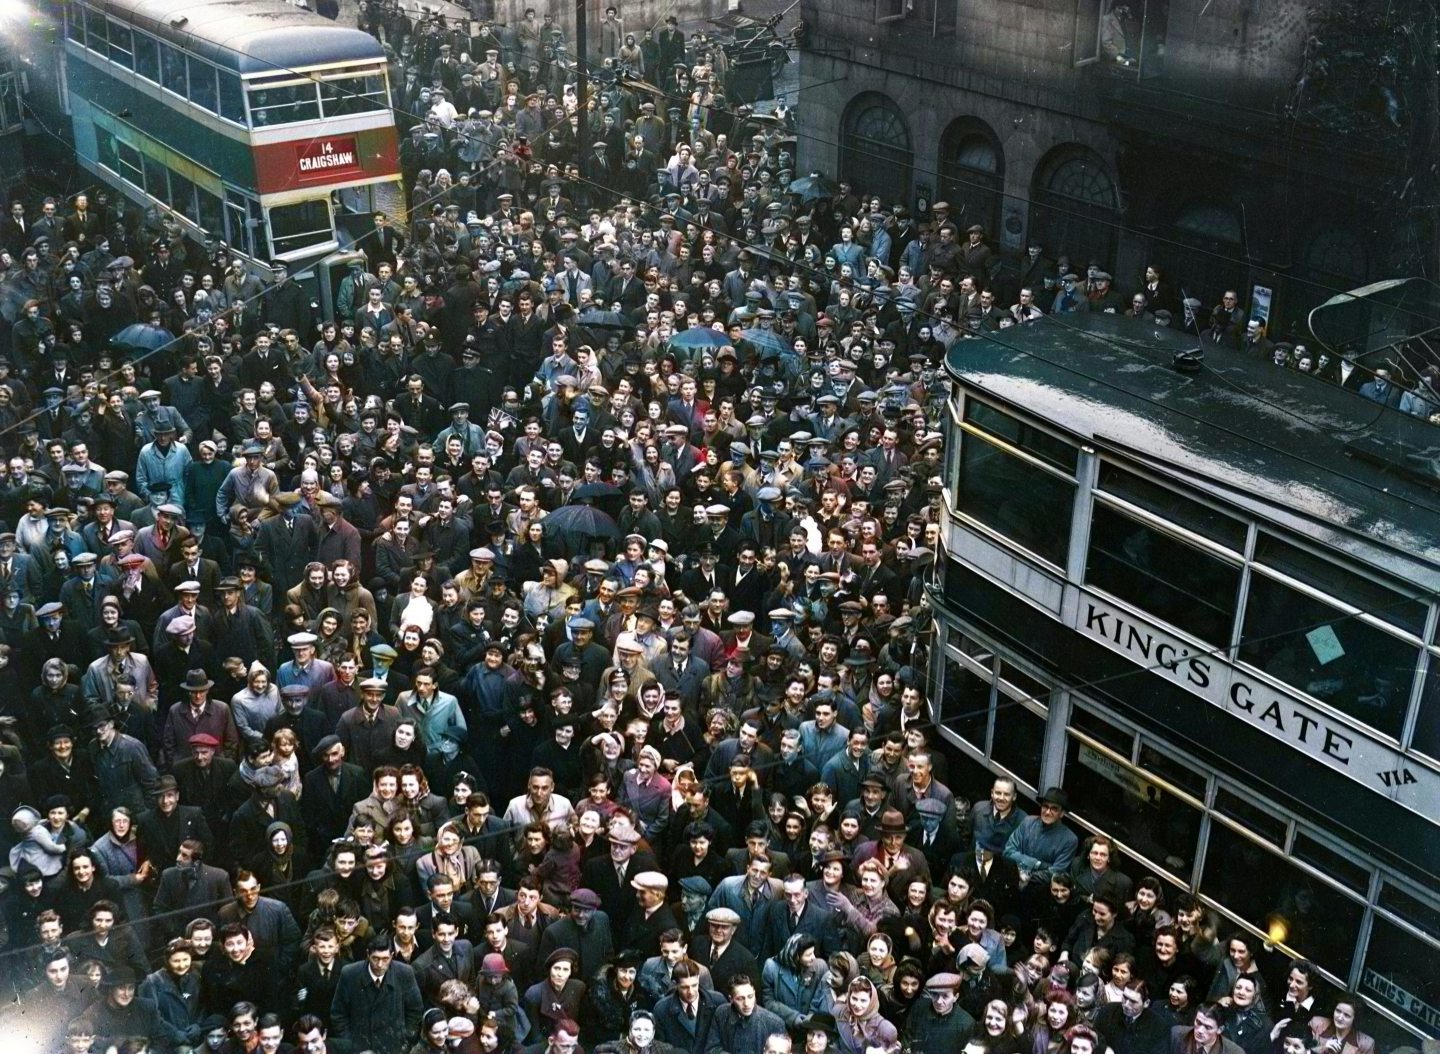
The war in Europe was over, there was jubilation and the city was decked out in flags, Aberdonians thronged on to streets with utter disregard to trams and traffic.

In HD you can see the rain on umbrellas, sailors on the right-hand side and lots of smiles on happy faces on VE Day. Image: DC Thomson

But it wasn’t until victory was declared in Japan that it was truly over.

While the newspapers still carried photos of casualties, there was relief and joy as wives and mothers were reunited with their husbands and children in Aberdeen.

Cpl. W Gray of the 2nd Gordon Highlanders arrived back from a Japanese POW camp with Donald Duck, his wartime companion. His delighted mother and sister look on. In colour, he looks gaunt after time imprisoned, you can also clearly see the ‘Bydand’ stag on his cap badge. Image: DC Thomson

ALL IMAGES IN THIS ARTICLE ARE COPYRIGHT OF DC THOMSON AND HAVE BEEN COLOURED USING ADVANCED AI. UNAUTHORISED REPRODUCTION IS NOT PERMITTED. 

To purchase archive photos, contact archives@dcthomson.co.uk

If you enjoyed this, you might like:

Conversation