Aberdeen were the better side on Sunday against Rangers – but the narrative has been dominated by their failure to hammer home their advantage to win, rather than draw, the game against their 10-man opponents.
However, it is important to acknowledge a couple of things Aberdeen did well in the opening 45 minutes of the Premiership clash.
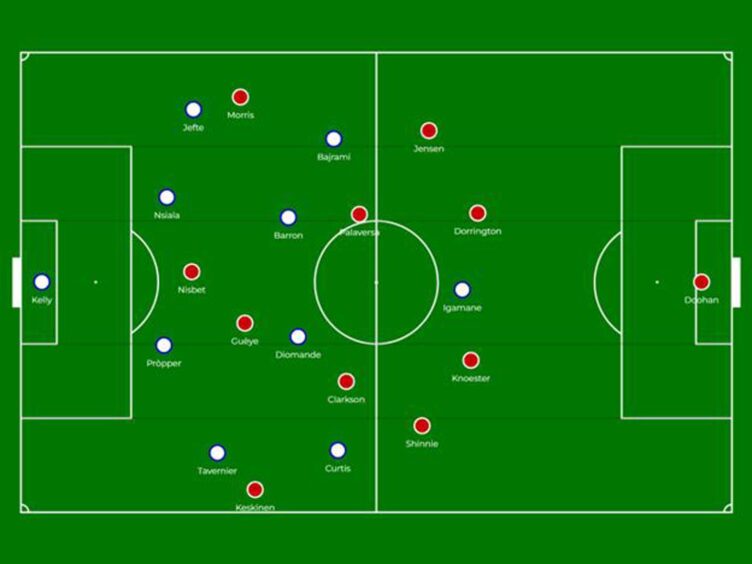
Rangers set up in the first period with a 3-4-2-1/ 3-4-3 formation and the Dons were able to exploit this in the wide areas – particularly the left wing.
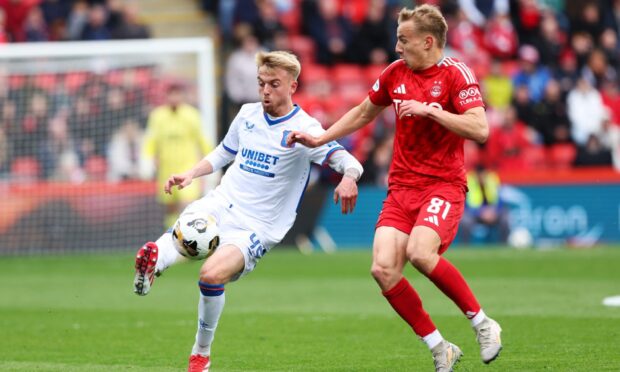
Topi Keskinen v Ross McCausland
Topi Keskinen had one of his strongest performances in a red shirt and gave Ross McCausland a torrid time.
The Rangers wideman, playing as the right wing-back, seemed to get caught in no-man’s land in transitions and did not have the pace to recover when the ball was turned over. It was in these moments that Aberdeen excelled in the first period.
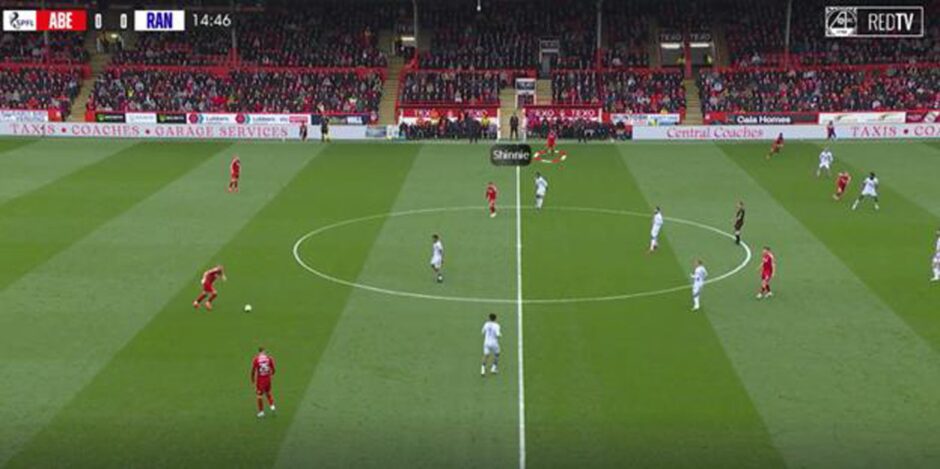
Here we have a simple goal-kick taken long by Gers keeper Liam Kelly where Aberdeen gained back possession, and already, below, we can see the distance Keskinen had on rival McCausland.
This in turn allowed him to receive the pass from Kevin Nisbet near the Rangers box.
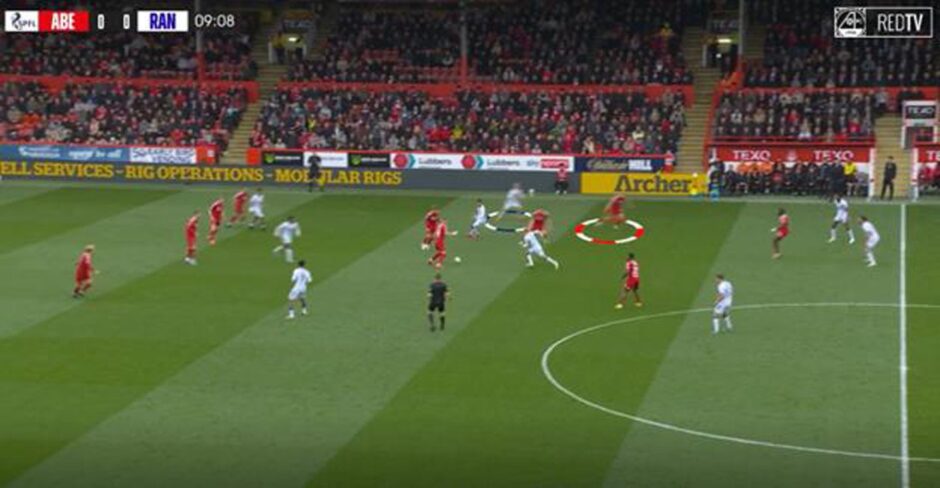
On 12 minutes, Keskinen won a duel in the Aberdeen half. A few seconds later, the Finn was bearing down on goal with runners ahead of him and McCausland trailing behind.
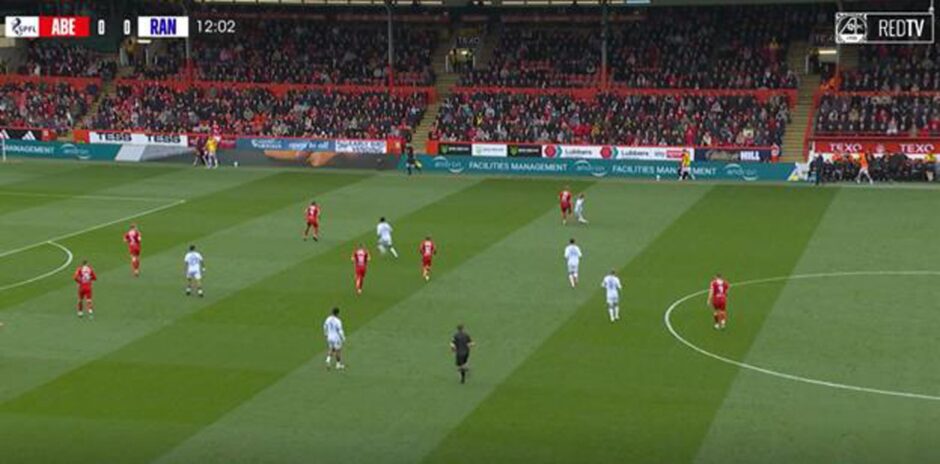
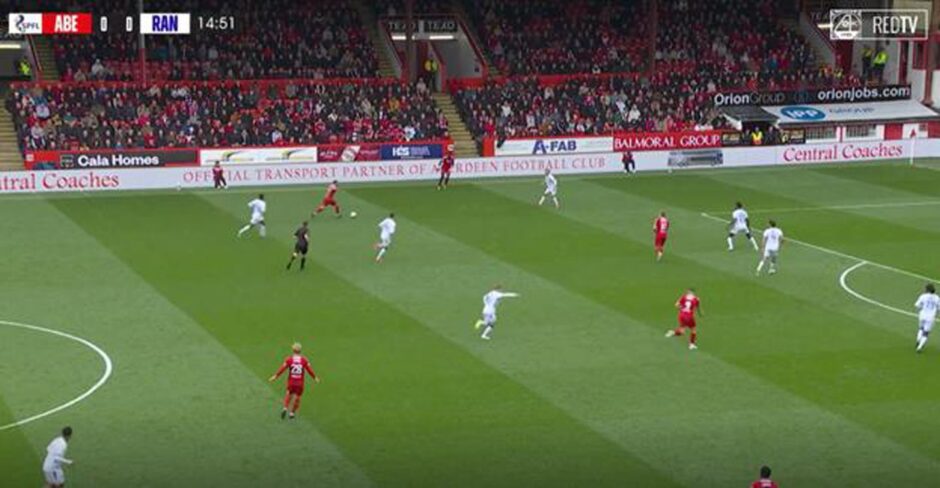
Finally, in an example with deeper Dons build-up – Ante Palaversa picks up and looks to hit Pape Gueye, who has pushed McCausland back.
Keskinen is now inside, Leighton Clarkson is occupying Danilo (Rangers’ right winger), and Graeme Shinnie is all alone on the left touchline.
When the ball is played, even though Rangers get a head to it first, it lands at Shinnie’s feet and Aberdeen have a great chance to attack.
The effect of this space on Rangers’ right side came to a head as the first half drew to a close, with Keskinen fouled for the free-kick Clarkson scored from, and then McCausland’s second yellow card (after Gueye’s flick-on sent Aberdeen’s Finnish winger in behind the defender).
On the Gers’ opposite side, young Findlay Curtis worked hard against Shayden Morris – but was hung out to dry for the second without the additional cover as the half came to a close.
This was a textbook Aberdeen Jimmy Thelin goal, underlined by the fact Morris now has six Premiership assists for the season.
Visitors Rangers shore up for second period
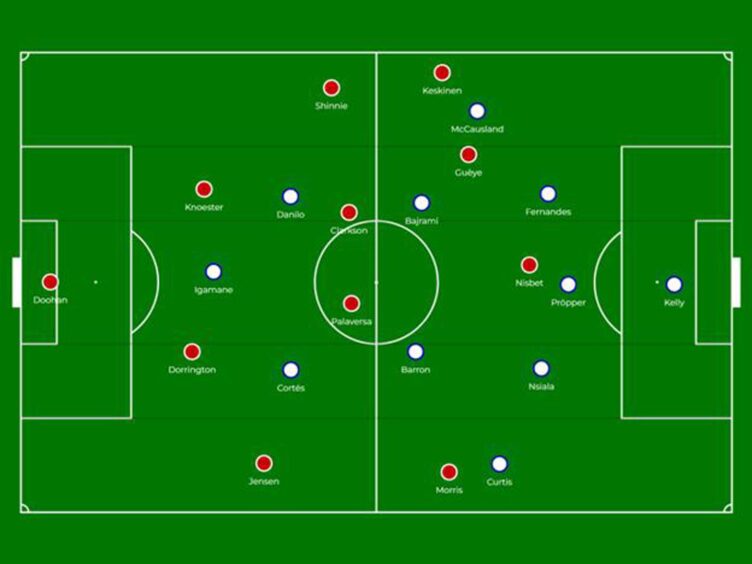
Rangers made changes at the break and moved to a 4-4-1, with James Tavernier and Jefte as the full-backs and Mohamed Diomande in midfield.
They were better organised, particularly in the wider areas – despite being a man down – and Igamane is strong enough up top to be a nuisance on his own. Nedim Bajrami, meanwhile, made many good runs from the left – a position he seemed much more comfortable in.
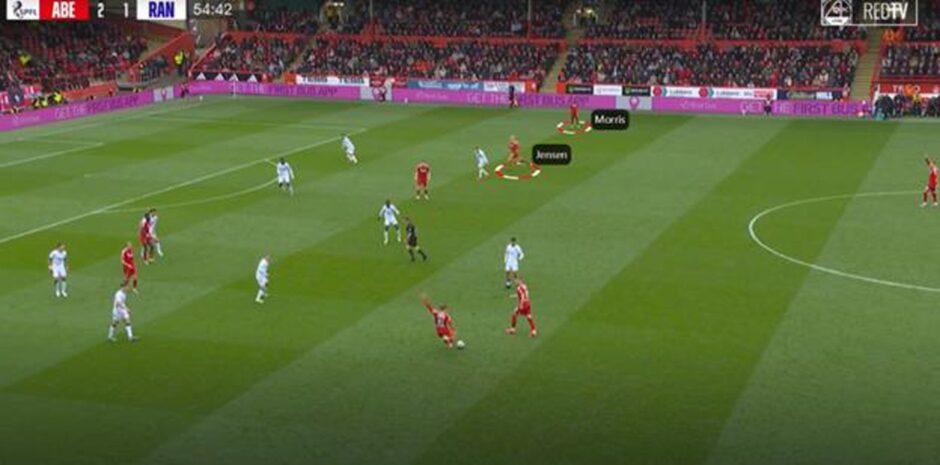
We can see their defensive shape in this image. (Note: the positioning of Aberdeen’s Alexander Jensen (inside) and Morris (wide) from an Aberdeen perspective)
However, the home side had several good second half chances.
Keskinen went narrowly past the far post on the hour, and Kevin Nisbet had a good opening a few minutes later.
Jimmy Thelin subs affect Aberdeen’s right side
Thelin’s substitutions have caught some heat.
The Dons manager typically subs a winger off after 60 minutes, so Morris leaving the field was certainly not unexpected and his replacement Jeppe Okkels had a decent outing going to the opposite wing.
The second round of subs on 64 minutes were a bit different from the norm – but it appears they may have been enforced due to Palaversa’s booking and a potential knock to Keskinen.
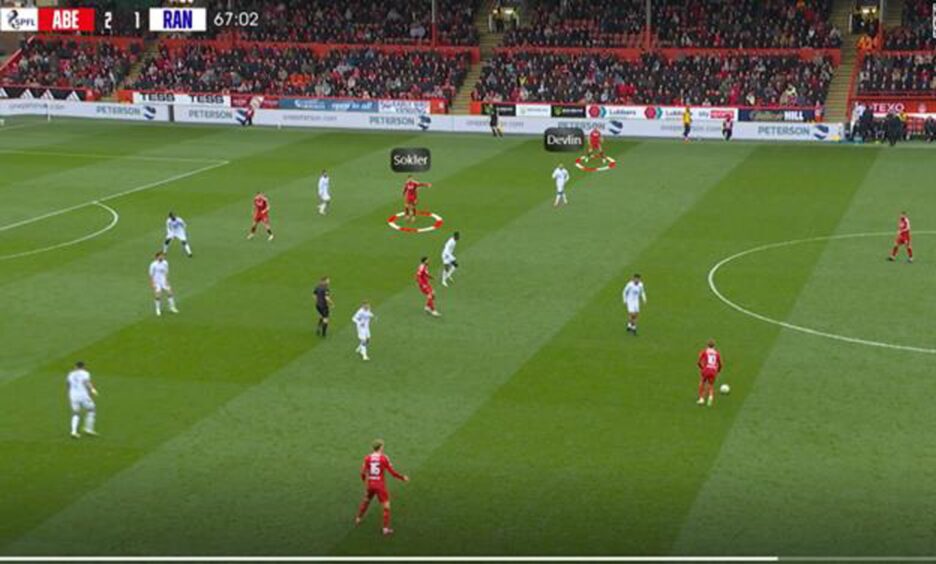
However, the adjustments were felt on both wings, but particularly on the right as striker Ester Sokler had to move to wing, but played more as an inside forward.
The screengrab below shows how this looked with replacement right-back Nicky Devlin on the touchline and Sokler inside (the opposite of how Jensen and Morris had been playing).
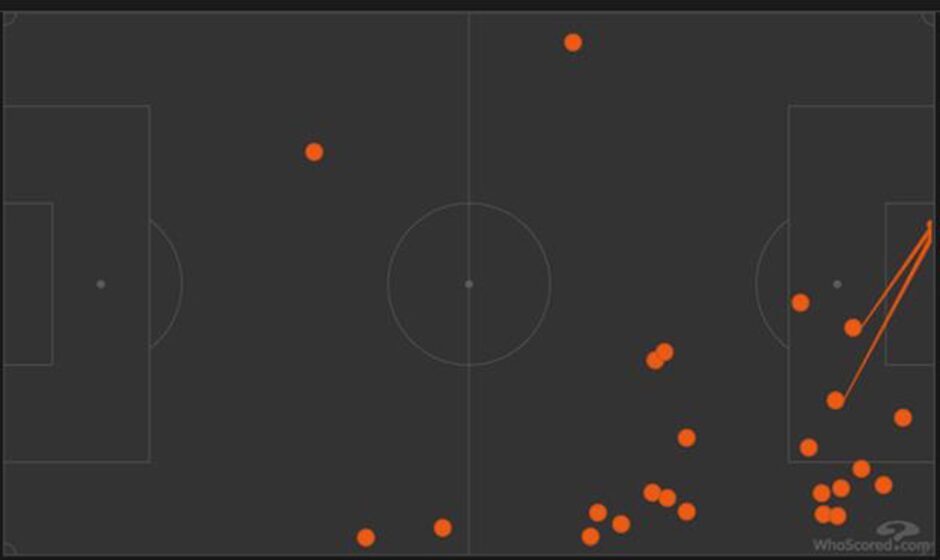
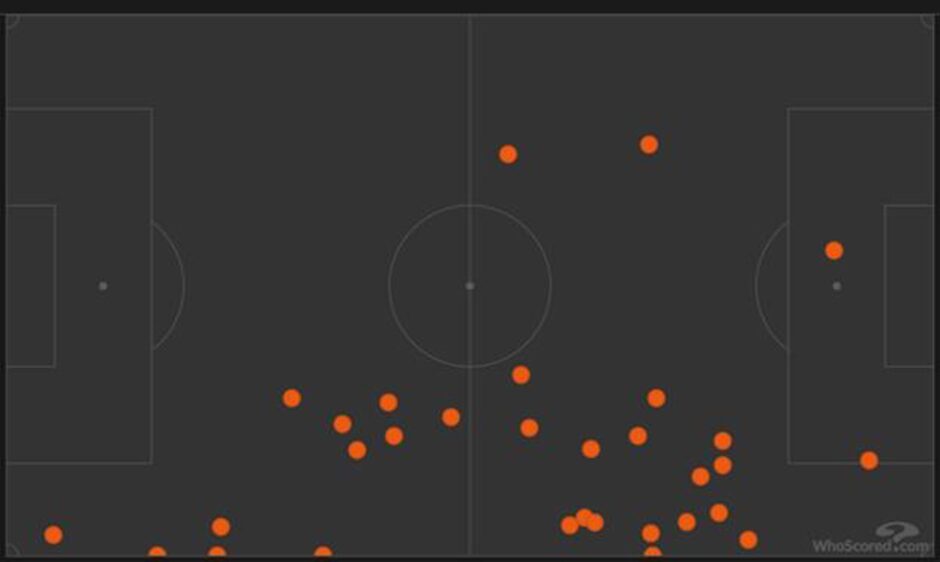
If we look at the touchmaps of Morris on the right for Aberdeen in the first hour versus Sokler and Devlin (in the last half hour), we can see that the second pairing failed to get into those dangerous areas beyond the length of the 18-yard box.
Shayden Morris right-side touchmap v Rangers:
Ester Sokler/Nicky Devlin right-side touchmap v Rangers:
The benefits of getting to the byline and cutting the ball back were shown in the Dons’ best chance of the half. But it was Alfie Dorrington who made the darting run from centre-back and laid one back for Nisbet to hit the side netting from 15 yards.
Unfortunately, the failure to grab a third goal left the door open to the chaos which unfolded in the 96th minute.
There are columnists in this newspaper far more qualified to discuss the defensive shortcomings for the two Rangers goals, but the equaliser was a litany of poor individual decisions that showed little awareness of the game state, from front to back.
Gavin MacPhee is a qualified coach, scout and analyst and holds a degree in Science and Football. He is the creator of www.afc1903.com, an Aberdeen tactical and data blog.
Conversation