
Aberdeen delivered a strong performance on Saturday to beat Hibs 1-0 and revitalise their hopes of finishing third in the Scottish Premiership.
Consistency is developing within the Dons team, particularly at home, and we can see strong patterns in the last three league games at Pittodrie – Motherwell, Rangers, and now Hibernian – and Jimmy Thelin’s side are now eight games unbeaten.
Hibs leave space for Aberdeen full-backs, and a high offside line
It has long been noted Hibs b0ss David Gray’s switch to a 3-5-2 formation against Aberdeen in November’s 3-3 draw was the catalyst for the Leith outfit’s upturn in fortunes.
Without the ball on Saturday, however, Hibs’ shape was more of a 5-2-3.
Josh Campbell replaced Junior Hoillet in their starting XI, presumably to add more intensity to the press, as illustrated when he helped force the turnover for Martin Boyle’s early effort.
Aberdeen were quickly able to identify the weakness in the visitors’ setup, with left-back Greame Shinnie and particularly right-back Alexander Jensen finding space and time on the ball beyond the Hibs front three and outside their two holding midfielders.
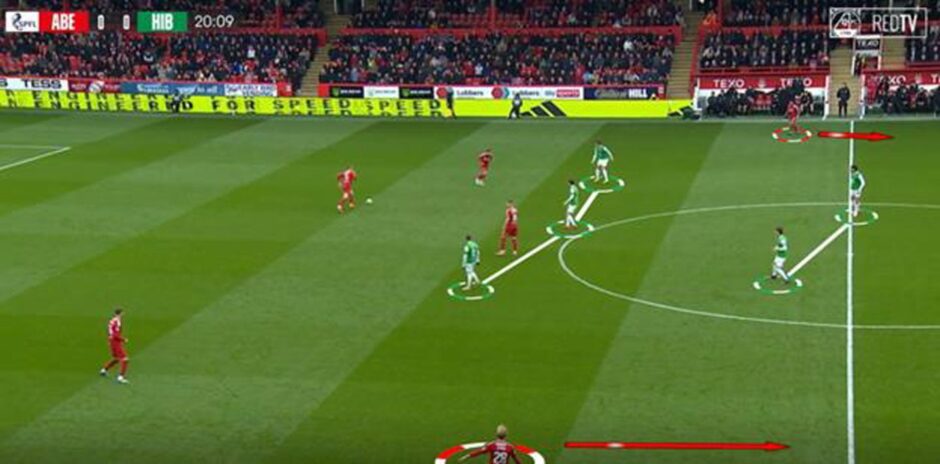
Hibs also deployed a high-line, which, with little pressure on the man on the ball, should have been a recipe for disaster – but the Dons were unable to take advantage.
Shayden Morris and Topi Keskinen were both getting caught offside early on, when neither player should need a head-start.
The best early Aberdeen opportunity came from Pape Gueye on 17 minutes, but his shot was blocked, as was Keskinen’s follow-up.
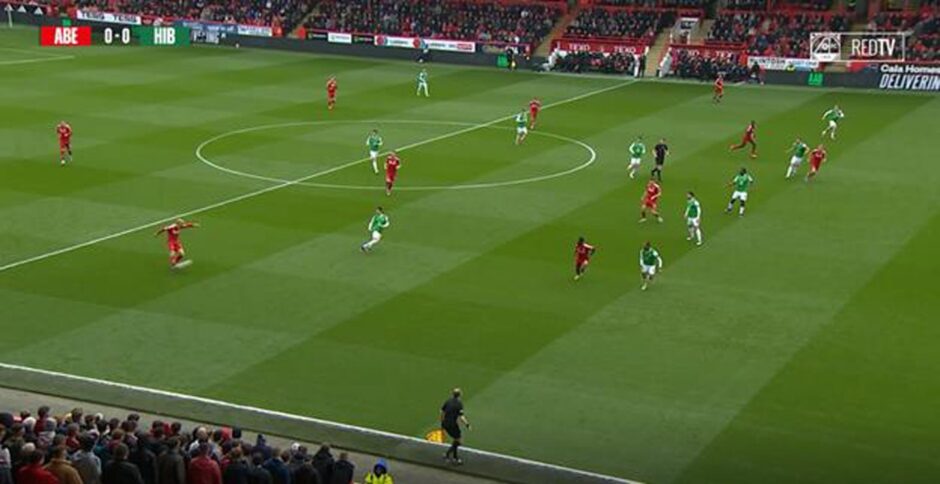
The visitors adjusted around the half-hour, pulling Campbell back into midfield and adjusting their out-of-possession shape to a 5-3-2, allowing them to apply pressure to the Dons full-backs a bit higher up the field.
Still there remained opportunities to get in behind the high-line, but Aberdeen could not quite get the timing of the runs and the pass in-sync.
Dons’ crossing
Aberdeen looked dangerous in wide areas and got into the Hibs final third on numerous times, but failed to get too many shots on goal.
According to the stats, the Dons had five successful crosses from 28 (17.9%) – it sounds pretty poor, but successful crossing is an inherently difficult skill.
For context, the Dons have averaged 22.2 crosses per game this season, finding a man 4.3 times (19.4%).
Keskinen had another good game and did well to get to the byline on a few occasions, as in this example:
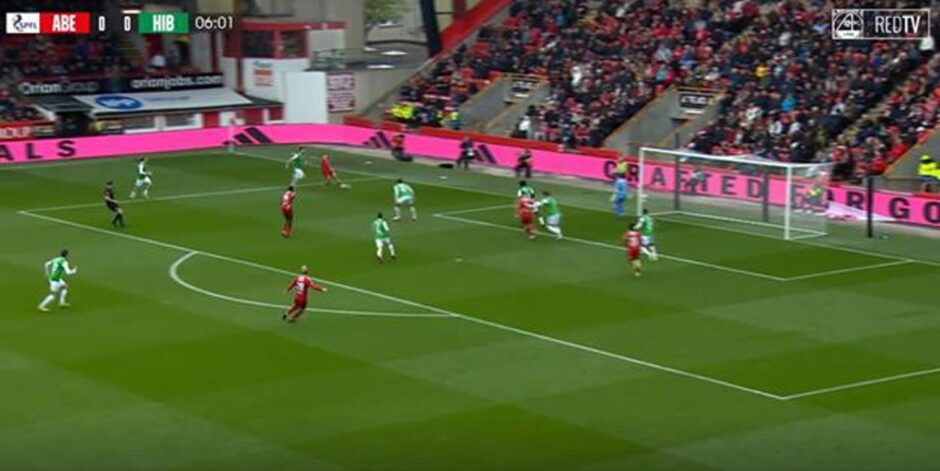
Jimmy Thelin wants overloads in the opposition box, but with Hibs playing with a back five at times, it was difficult to do so.
Here we have five green shirts against three Aberdeen men – Rocky Bushiri shackled Nisbet on most occasions, and the quality of technique and/or decision-making was not always there.
Here, Finn Keskinen opted to try to find Nisbet, but perhaps a cut-back to Gueye, or a chip to the back post for Jensen (not easy) would have been better.
Don’t think second-half magic was off the cuff!
Hibs started the stronger in the second half, a period of the game when there was little controlled possession, and looked the more likely to score with good efforts from Campbell and Bushiri – the latter going close from a corner – a constant concern all match.
As the half progressed, the home team got more “stable”, and the inclusion of Jamie McGrath and Jeppe Okkels added more technique in the final third. Dante Polvara and Oday Dabbagh, meanwhile, added more thrust.
Yet, the Dons again failed to fashion any real attacking openings – aside from Okkels’ tight offside which led to the ruling out of Nisbet’s first ‘goal’.
The winning strike, when it came – as numerous column inches have noted – was a sublime piece of individual brilliance from Nisbet, but there was also evidence of the finer details executed by the players to create the crossing opportunity.
With the ball working its way over from the right-back spot, Shinnie made a forward inside run.
At the same time, Okkels shuffled back on the touchline towards Mats Knoester. Both players were followed by Hibs markers.
The Dutchman played a longer pass into Nisbet, who found Shinnie, who had now evaded Campbell in space high up the pitch.
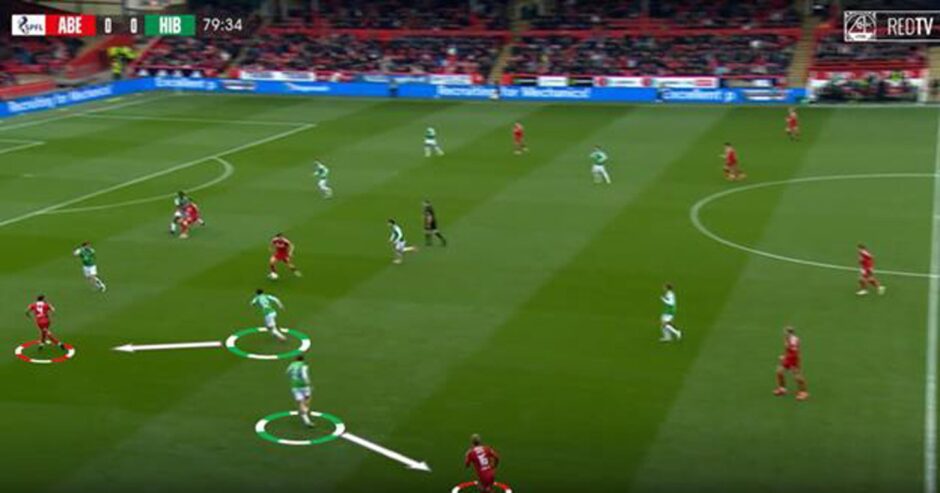
This may have all been off the cuff, but it’s more likely these are patterns or principles the players work on in training to get them into the crossing positions – it almost looks like an unopposed passing drill from Cormack Park.
Shinnie did very well to get a cross in, but inevitably Bushiri was able to get it away.
Freed from this tight marking, however, Nisbet just needed a wee bit of space to pull a rabbit out of the hat.
And that’s the thing about crosses – sometimes the second contact can be just as important as the first… and sometimes it just needs to fall to the right man in the right place at the right time.
Gavin MacPhee is a qualified coach, scout and analyst and holds a degree in Science and Football. He is the creator of www.afc1903.com, an Aberdeen tactical and data blog.
Conversation